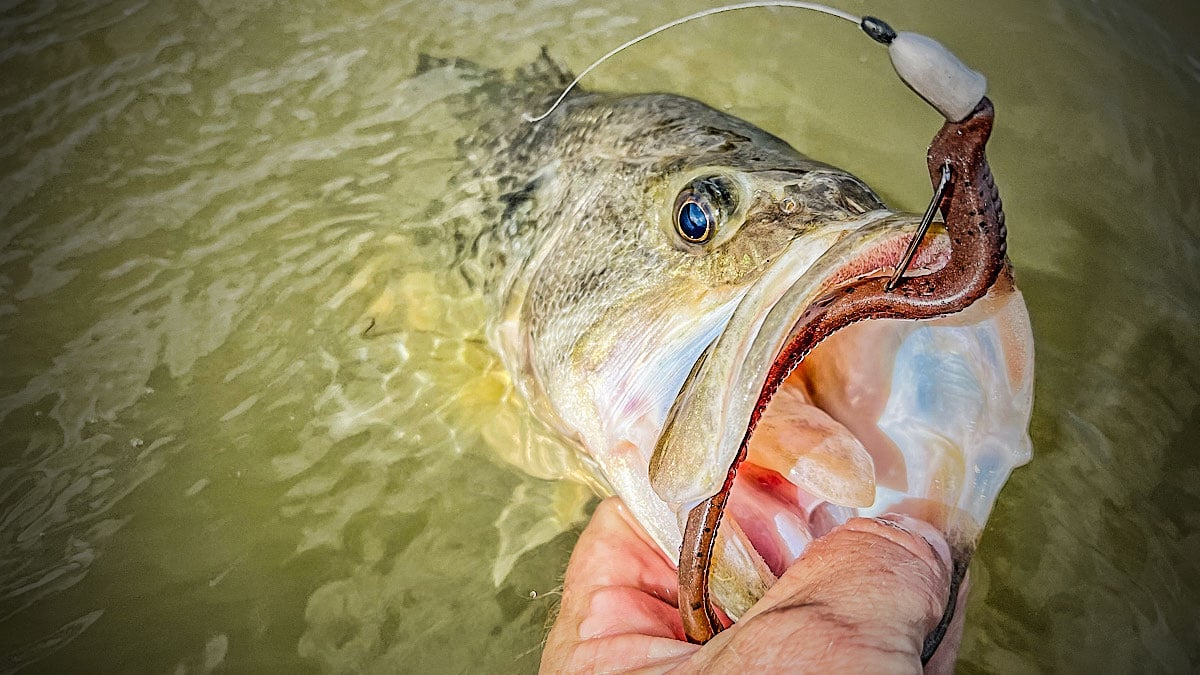
A basic floating worm is one of the most versatile bass fishing baits on the market, simply because it can be rigged several different ways. With the same slim piece of soft plastic, you can fish along the surface or in 30 feet of water and beyond.
A bass fishing worm can be fished weightless or weighted, with a handful of different options on the size, type and position of the weight used. Today, we’re going to dive into this a bit and look at 12 ways to rig a floating worm and how they differ.
Weightless Texas rig

Rigging a floating worm weightless with an offset worm hook is a fantastic finesse technique for targeting large bass shallow around the spawn. Bass are often a little skittish while on bed and in the immediate post spawn. A weightless floating worm gives you a bait that can cover a fair amount of water, as long as the water is clear, while being completely non-threatening to a bass.
This is also a great option in stained to muddy water when cover is present. The bass may still be a little standoffish certain times of the year, but they usually can’t resist a weightless floating worm in these situations as well.
Carolina rig

You can rig a floating worm the same way but add a weight, bead and swivel up the line a bit and create a Carolina rig. This is the basic idea but setting up the rig is a little more complicated. You’ll use a short section of lighter fluorocarbon or monofilament line as a leader between your hook and the swivel and typically a larger pound-test for your main line. Mono, fluoro and braided line are all options here.
As the weight, bead and swivel drag across the bottom, they create a trail of stirred up mud and silt. The floating worm then slips and slides its way through the cloud and along the bottom. Using monofilament as the leader will help the bait float a bit more than the higher density fluoro, which sinks.
Split shot rig

Similar to a Carolina rig in some ways, the split shot rig is essentially its little cousin. The main differences are that the weight is a good bit lighter and clamped onto the main line, as opposed to larger weight that’s free to move up and down the main line with a Carolina rig.
There’s also no leader with the split shot rig. Instead, there’s one continuous line from the reel to the hook, with the weight clamped on a foot or so up from the hook. You’ll want to use fluorocarbon with this rig and you must be sure not to clamp the weight down too firmly, as the sharp edges of the lead can damage the line.
Free rig

Staying in the same vein, we move over to the free rig. Just as we did with the weightless Texas rig, Carolina rig and split shot rig, the rigging of the actual floating worm is the same. You can use an offset worm hook, straight-shank hook or EWG if you like; just rig the worm weedless. But first, slip a weight up your line.
Before tying on your hook, slip your line through the metal loop of a bell weight and you’ve created a free rig. This setup is aptly named “free rig” because the weight can move freely up and down your line all the way to the nose of your bait. Granted this can also happen with the next rig we’ll discuss, but a free rig is unique in that the line moves more freely due to how the weight is attached to it.
Texas rig

Putting a bullet weight in front of a weedless rigged floating worm you create what is known as a Texas rig. You can peg the weight with a toothpick or a rubber peg or use a bobber stopper to keep it in place. Or you can leave it unpegged as well, so it can move up and down your line, somewhat similar to the free rig we previously discussed.
The advantage of the free rig over the Texas rig is that it’s a little more sensitive since the majority of the weight maintains contact with the bottom. But the conical shape of the bullet weight at the front of the Texas helps it come through cover a little better. So both rigs have their advantages.
Shaky head

Shifting slightly over to a shaky head, we have the setup that is perhaps the most similar to the Texas rig. A shaky head uses a jighead combined with a floating worm to create a weedless presentation for fishing along the bottom. Shaky heads are typically considered more of a finesse approach as compared to a Texas rig and come through certain types of cover more effectively.
A shaky head is better suited for fishing around many different kinds of rocks for instance, where the bullet weight of a Texas rig is likely to wedge in and snag. This way of rigging a worm is a little more sensitive than a Texas rig as well, since the jighead maintains better bottom contact.
Wobble head

Kind of a hybrid between a shaky head and a Texas rig, a wobble head acts as a hinged jighead of sorts or maybe even a pegged Texas rig. The wobble head is more sensitive than a Texas rig but also allows the bait to move more freely than a shaky head.
Because of this free-swinging hinged characteristic, a wobble head is a great way to rig a floating worm when fishing in current or in a bed, for another example. In current, you can let the rig sit still, but the worm will gently wash around. In a bed, you can let a wobble head sit right on the sweet spot, while the worm wiggles around in the bass’s face, which creates an irresistible offering.
Tokyo rig

By essentially adding a short wire to a wobble head, we arrive at our next setup—a Tokyo rig. A Tokyo rig really shines in situations where the bottom is silty or covered in short vegetation. The weight at the bottom of the wire gets the bait down on the bottom, but the floating worm being elevated a few inches up off the bottom stays clean.
These are not the only situations where a Tokyo rig can works well though. This is still a relatively new technique. So it gives the bass that have been conditioned to a Texas rig, shaky head, jig and other bottom presentations something a little different to look at. And different is all it takes sometimes to set the fish off.
Drop shot

Stretching the distance between the weight and the hook a bit, we go from a Tokyo rig to a drop shot rig. The biggest difference here is that there’s no wire, instead there’s a drop leader of fluorocarbon that spans the gap between the bait and the weight.
Typically rigged with a fairly short drop leader of 10 to 12 inches, a drop shot is a fantastic finesse approach for targeting bass vertically that are along the bottom or suspended up in the water column and around cover.
Wacky rig

Taking the weight out of the picture for a moment and moving the hook to midsection of the worm, we have what is known as a wacky rig. This is a fantastic way to rig a floating worm for skipping docks and other shallow overhanging cover.
Much like the aforementioned weightless Texas rig approach with a floating worm, a wacky rig works really well around the spawn when the bass are a little more finicky. But where you’ll want to work a weightless Texas-rigged worm across or just under the surface, a wacky rig’s main appeal is its slow, vertical fall.
Weighted wacky rig

If you want to fish a wacky rig a little deeper or a little faster, incorporating a wacky jighead into the setup in place of a regular hook will do the trick. This is a great technique for fishing bluff walls, dock posts or other vertical cover where the bass may be suspending along the cover several feet below the surface.
Though you can fish a weighted wacky rig on a spinning rod as you would several of these other finesse techniques, the added weight of the jighead makes this setup a little more baitcaster-friendly than these other light rigs.
Neko rig

Though you run the hook through the midsection of a worm to form a Neko rig similarly to a wacky rig and a weighted wacky rig, that’s about where the similarities between these three end. A Neko rig is really more of an intersection between a shaky head and a wacky rig, as opposed to a close relative to the wacky rig. The reason being, a Neko rig is meant to be dragged along the bottom with the worm in a vertical orientation, as opposed to falling horizontally.
By adding a nail weight or Neko weight to the head of a floating worm, you can create a presentation that moves along the bottom in a head-down orientation like you’d see from a shaky head. But the worm actually has an entirely different action, as its movement originates from the midsection of the bait being pulled forward at the point of contact between the hook and the worm.
There are even more ways to rig a floating worm when you really get off into the weeds. But mastering these 12 will make you a well-rounded angler, giving you an approach for almost any set of conditions, especially if a finesse technique is necessary.