Whether slinging a ChatterBait or making his first cast with the boat just off plane, Bryan Thrift is known for fishing fast and extreme efficiency. But before making that first cast, he relies on side imaging to read the water and find hidden gems with speed and clarity. Thrift explains how to configure and maximize your side imaging range with a simple preset in this short video.
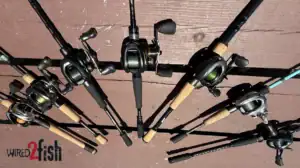
Boat Setup
- FISH FINDER – Humminbird APEX 13 MEGA SI+ Fishfinder/Chartplotter: Buy at Bass Pro Shops
- LIVE SONAR – Humminbird MEGA Live 2 Imaging Transducer: Buy at Bass Pro Shops
- TROLLING MOTOR – Minn Kota Ultrex QUEST, 112lb, 36V, 52″: Buy at Bass Pro Shops
- MAPPING – Humminbird LakeMaster Premium VX Digital Map Chart Card: Buy at Bass Pro Shops
- BOAT – Ranger Z520R: Check out at Ranger
- MOTOR – Mercury Pro XS 250hp: Check out at Mercury
How Bryan Thrift Uses Side Imaging to Eliminate Water
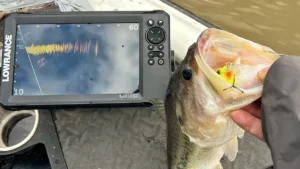
Thrift spends much of his pre-fishing period idling around with side imaging to survey structure and cover beneath and off to the sides of his boat. He runs his MEGA Side Imaging at 130 feet on both sides of the boat, providing a total viewing width of 260 feet. This wide field of view allows him to scan large areas quickly and accurately.
To further enhance clarity, Thrift switches to a custom split-screen view that shows both left and right side imaging in full width. This adjustment makes elements like brush piles, bait balls, and bottom composition changes more visible and easier to interpret.
Tips for Fine-Tuning Your Fish Finder Settings
Throughout the video, Thrift explains how fine-tuning your side imaging will help you identify high-percentage spots quickly. Whether practicing for a tournament or simply trying to be more efficient with limited time, Thrift’s side imaging layout tip will help you make the most of your time on the water.


![[VIDEO] How Brandon Palaniuk Uses the One-Boat Network App](https://www.wired2fish.com/wp-content/uploads/2025/06/one-boat-network-300x169.webp)
![[VIDEO] How to Install the Garmin Force Pro Trolling Motor](https://www.wired2fish.com/wp-content/uploads/2025/06/trolling-motor-install-300x169.webp)