In part one of our three-part series with electronics guru Aaron Martens, we spoke to him about the importance of his electronics and what major features are the most important to him. In this piece, part two, he delves a little deeper into the settings and tweaks he makes to his electronics to dial in on sweet spots and how the new electronics have sped up the process of finding fish for the amicable pro. Many of the items mentioned below he has not shared before in a public forum.
W2F-How involved do you get with your electronics and what are some of the settings you think are mandatory?
AM– I think most people get confused on setting up their units. Not because they are overly complicated but rather because they don’t adjust them to the conditions. I mess with my electronics all the time on the water, even while fishing. Sonar is one thing and side imaging is the other.
Chart speed for sonar is one variable. Slower speeds like 3 or 4 are much better when on the trolling motor than say 15. Setting your speed of the graph based on boat speed is crucial to seeing the best picture of the bottom and being able to capture the object much better. I also use the + and – buttons and the cursor to zoom in on the object to get a better, more detailed look at the object as well. I want to know everything about what I am casting at
If it’s a stump I want to know how the roots run and if there is space below it where a fish might live. I want to know if a tree has a root wad or branches. The same is true with shell and rocks. I want to know where the big rocks are and if there are piles of shells on an area. The new electronics allow me to look at these objects in greater detail and even stop the screen and capture the object. That is super cool to me.
I use mostly the original palettes for colors. I have great eye sight but am a bit color blind, so it’s important for me to have the visual acuity that fits me best. This is an area where each individual has to choose what is best for them. Some palettes work best in bright conditions and some work better when it’s overcast. The colors are not as important as the contrast. For example, one of my tricks is to look at drops on side imaging shallow to deep first. You can use space and more clearly see fish or an object close to the drop better that way.
If you are in 10-12 foot of water looking over 30 you use the “void” (black space) to see fish more clearly. You are able to eliminate one dimension, the background, to look at the area and focus in on how the fish are positioned. In the old days with just sonar, this was tougher as you had to drive over the object or drop to look at it. With side imaging, I can eliminate and pinpoint where the fish are much better, and much faster too.
W2F– With most of the new electronics on the market today, there are hundreds of settings with small differences. What is a general rule of thumb when setting some of them? Which are most important and do you have some tricks that you use.
AM– First of all, and as I have mentioned earlier, I am always working on settings when I am on the water. Sensitivity, chart speed and side imaging width are ones that I mess with all the time. A general rule is more power is needed in deep water than in shallow and a lot depends on how fast you are moving. If I am on the trolling motor, I slow the way down to 4 or 5 and the chart speed as well. I want a good look at the object or spot and with the chart speed too high you miss a lot. I also use the Zoom feature (+ or – keys) and the cursor to look at a spot in more detail. If I see something I move the cursor over to it, zoom in and adjust the sensitivity based on depth. This gives me the detail to know if fish are present or if it’s worth looking at later. If it looks good and no fish are present, I may waypoint it and come back to it if the conditions change or I am fishing close to that spot.
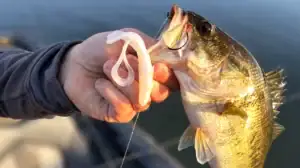
With side imaging, I will use only one side on occasion when its appropriate. If the ledge or bank I am looking at or fishing is to the right of the boat I may choose to use only the right side of the screen. By doing that it gives me a larger view and keeps me focused on that side to pinpoint sweet spots and schools of fish. I have been using this technology for quite a while now, and I can actually tell the difference between a shad and a bluegill. No kidding! By looking at the height of the fish it is actually pretty easy to see. In hot summer months I actually will look shallow for bluegills instead of shad because the chances of catching a bass here is better. Bass under or chasing shad are usually gorged and will not eat as readily as a shallow bass with fewer targets. Bass chasing bluegills are many times bigger fish too.

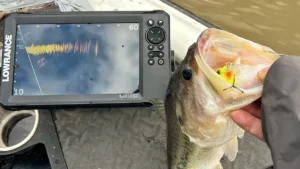
Another Humminbird Side Imaging capture shows a school of small fish or large bait on a small break
A neat thing I have seen on deeper fish is bass chasing through a pod of baitfish and a void opening as they scatter. That is super cool.
This is the end of part two. Part three discusses Aaron’s success fishing tournaments as a result of his intimate knowledge of his electronics.


![[VIDEO] How Brandon Palaniuk Uses the One-Boat Network App](https://www.wired2fish.com/wp-content/uploads/2025/06/one-boat-network-300x169.webp)
![[VIDEO] How to Install the Garmin Force Pro Trolling Motor](https://www.wired2fish.com/wp-content/uploads/2025/06/trolling-motor-install-300x169.webp)