It’s no secret that marine electronics have drastically advanced over the last several years. These electronics allows anglers to be more efficient on the water and target fish in new ways than ever before. While these electronics can be extremely effective, they’re not always easy to use. Understanding these tools takes lots of experience and time of the water. While getting familiar with these electronics is important, there’s a few simple tips and tricks that can make your electronics more efficient and effective on the water.

POWER
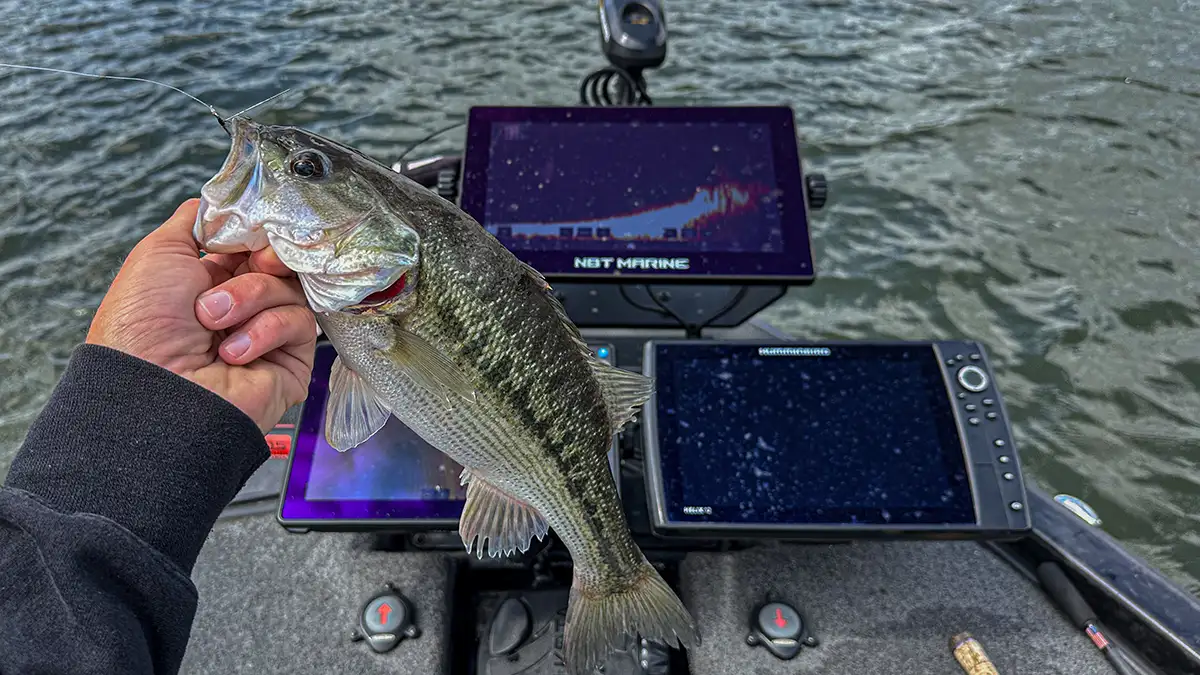
One of the most important components in helping your electronics run properly is power. In todays world it’s not uncommon to see anglers running upwards of five graphs, numerous transducers and a wealth of other electronics. This demands a ton of power, so it’s important to ensure that everything is receiving maximum voltage. The standard depth finder requires a little over 12 volts to be functioning at maximum capacity, however when you run multiple electronics it can be difficult to ensure they’re all receive the correct amount of power. Whenever a unit goes under 12 volts you will often experience blackouts, drops in image quality and a variety of other negative effects. The two main reasons this happens is because of battery power and your connection.
Obviously running the correct size battery is your first step in ensuring maximum performance. I recommend running lithium batteries with enough amp hours to satisfy whatever electronics setup your running. I run 5 12-inch graphs and one 16-inch graph which draws a ton of power, because of this I run two Impulse Lithium 105 amp hour batteries in parallel. This is more than enough power for the average electronics setup, however it’s important to talk with a lithium battery expert when deciding on the correct battery for your electronics.
One step that many anglers overlook is getting the right wiring harness. Voltage drops are often due to poor connections which can result in a subpar performance from your electronics. Many anglers make their own harnesses using heavy duty wire, however I prefer to go with a store bought harness. These harnesses are professionally made using quality components and don’t break the bank. There are numerous wiring harnesses on the market today, however I’ve used the Sea Clear Power Harness for the last several years and have yet to have an issue.

HAVING THE RIGHT MAPS
One of the most useful features we have as anglers is mapping. Electronics have provided us with detailed maps of nearly every body of water in the country. There are numerous mapping companies that all make high quality maps for different regions of the world. I run both Humminbird and Lowrance depth finders, so I’m able to use Lakemaster, C-Map and Navionics map chips. Each one has their own unique benefits that can help you become a more productive angler.
To start, Humminbird Lakemaster chips have some of the most detailed contours available. Not only are their contours exceptionally accurate, but they have depth shading features as well. Setting up depth shading is a great way to quickly identify specific depths. I’ll often make shallow areas less than 5 feet red, and gradually change colors every 10 feet. Another great feature is side imaging lines. Humminbird has an option that adds bars to the side of your boat icon. These bars show exactly how far your side imaging transducer reaches while idling. This is an easy way to quickly identify exactly how far your looking when graphing a specific piece of structure.
While I’m a huge fan of Humminbird and Lakemaster mapping, Lowrance and C-Map also have some fantastic features as well. Depth shading is a feature on Lowrance mapping as well, and is something I’d recommend to any angler looking to be more efficient with their electronics. They also have bottom composition and vegetation maps which your able to download on the C-Map website. These are great for quickly breaking down new bodies of water whether you’re looking for hard spots or expansive grass flats. Another feature that I really appreciate on Lowrance mapping is your ability to add a directional arrow. You can manually set the distance of this arrow that shows exactly how far away your waypoints and other locations are. I have mine set at 100 feet so I always know how far I am from approaching a specific target. This is a super useful feature for fishing brush piles and other types of offshore cover.

DIALING IN YOUR SETTINGS
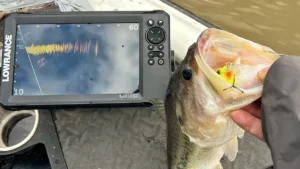
While mapping is extremely important, getting the most out of your transducers is arguably just as crucial. Whether you’re running 2D, side scan or live imaging, there’s a variety of settings you need to adjust to get the most out of your transducers. To start, let’s focus on side and down imaging. Typically there are three main settings I like to adjust, these include sonar speed, contrast and sensitivity. Sonar speed dictates how fast your transducer picks up images along the bottom. I usually keep this on a slower speed as the picture is much clearer, my graphs speed range is between 0-20, and I usually keep mine in the 5 to 6 range.
Sensitivity and contrast however are something I change on a regular basis. I change these settings based on water clarity and bottom composition. The perfect settings often vary from lake to lake, so it’s important to experiment with your settings whenever you travel to a new body of water. I adjust sensitivity mainly based on the water clarity. The higher the sensitivity the more blown out your image will get. In super clear water you can up your sensitivity and get a super clear image due to the lake of disturbance in the water. In muddy water however, you often have to decrease sensitivity. This will help prevent disturbance from all the junk floating around in the water column giving you the clearest possible image.
I adjust my contrast on the other hand based on bottom composition. In soft bottom scenarios I up the contrast allowing me to see details much easier. On hard bottom the image pops, so I’ll typically decrease the contrast allowing me to see detail without blowing out the image. These settings are super easy to adjust and really help your overall efficiency once you get them dialed in. After playing with these setting for a couple minutes you’ll quickly get comfortable with what settings work best for you.

USING SHORTCUT BUTTONS
Last but certainly not least, setting your shortcut buttons is a great way to make your electronics more efficient. Depth finders like Lowrance HDS Pro have multiple buttons that allow you to quickly setup shortcuts. You can set these buttons to do a variety of different functions, and they’ve really helped my overall efficiency as an angler. There is four shortcut buttons on my Lowrance, and I set them all to do something different.
My first shortcut button simply standbys my unit. This makes it easy to turn the screen off as I run to the front or back of the boat. This is a simple way to save battery power over the course of the day. The second shortcut I have sets a waypoint. Whenever I idle over something that looks good, I can simply mark a waypoint with just a click of a button. This is an easy and effective way to quickly make cover and structure you want to come back and fish. My last two shortcuts are set to switch between my mapping and scanning pages. This allows me to switch between mapping and scanning with just a click of a button. This saves a bunch of time compared to going to the home screen and shuffling through all the different page options. While I have these features setup on my Lowrance, you can do simple shortcuts on a variety of different depth finders.
Electronics play a major roll in bass fishing, so it’s important to make sure they’re working at maximum capacity. Spending time of the water and fiddling with your depth finders is the fastest way to get efficient with these advanced pieces of equipment. Whether you’re a professional with electronics or just starting out, these tips and tricks will ensure your electronics are performing at their best.


![[VIDEO] How Brandon Palaniuk Uses the One-Boat Network App](https://www.wired2fish.com/wp-content/uploads/2025/06/one-boat-network-300x169.webp)
![[VIDEO] How to Install the Garmin Force Pro Trolling Motor](https://www.wired2fish.com/wp-content/uploads/2025/06/trolling-motor-install-300x169.webp)