High-end terminal bass fishing tackle boxes are a thing now and I absolutely love them. For years, my terminal tackle was a scattered mess of slowly rusting, paint chipping and dulling hooks, weights and jigheads. Then came along the high-end terminal tackle box era and it solved so many of my problems, albeit first world problems, understandably.
For many anglers, however, these boxes just aren’t available at a price point they can justify when they might only fish once in awhile. If you’re a competitive angler or even a recreational angler who pours a good bit of money into tackle, I highly suggest one of these high-end terminal tackle boxes and think they’re a worthwhile investment.
But on the other hand, if you’re someone who just likes to go fishing now and then and would prefer not to spend your time untangling hooks and rubbing the rust off of them, this piece is for you.
I’m going to walk you through a little DIY project and assemble a nice terminal tackle box that will keep your gear orderly and protected.
Foam and tray
One of the first things you’ll need to do is track down some sort of foam; a swimming pool noodle is one of the first things to come to mind that is probably readily available for most of you. But I’ve actually had some items shipped to me before that were packed with high-density foam as well and something like that will work, too.
Once you have your foam, find yourself a tackle tray. I do recommend using a waterproof one with a seal if you can afford it. But if you just want to use a standard 3700-size tray, you can do that as well. A tray with a waterproof seal though will greatly aid in preventing rust and corrosion from reaching your tackle.
Fit foam to tray
Once you’ve selected your tray, cut little blocks of the foam to fit in the tray. If your tray has adjustable dividers, feel free to move these around as you like. Basically in this step, we’re trying to create the same feel that you get from the high-end terminal tackle trays that use foam to secure hooks, jigheads, weights and other loose tackle.
As you lay out your box, you can customize it however you’d like. If you have more fishing weights than another angler, you’ll want to design your box accordingly. If you use more jigheads than someone else, your box should reflect that as well. Don’t feel confined here to lay it out exactly the way I have for this example. Instead, build it to best suit your specific needs.
Modify foam blocks
The options here are again wide open but here are some ideas. You can use various-sized drill bits and a drill to make holes in the foam to store bullet weights. This will protect painted weights from beating around on each other and chipping the paint jobs. When doing this, don’t drill through the foam while it’s in the box. Instead, use a piece of scrap wood to brace the foam against while you drill the holes.
Using removable foam blocks like this is actually better in some ways than some of the professionally made terminal boxes with foam, since the weights can get stuck down in the holes of those. If that happens with these, you can just pull the block out of the box and push the weight all the way through. Make sure you make the holes a little smaller in diameter than the weights so they will fit pretty snug and not just fall through the holes.
You can also cut slits in the tops of the blocks so you can also keep hooks organized and again, keep your jigheads from chipping the paint off each other. There’s also the option to not even cut slits in the foam and instead just insert the hook points into the ends of the foam to keep the tackle separated. Then lift the block out when you need a hook and slide it out.
Other options
You can also use small plastic containers to organize swivels, beads, split rings and other easy-to-lose items. You can get a whole box of these for next to nothing and slip the little containers out when you need something.
Using a Sharpie marker to label these is a good idea as well. This is especially helpful when trying to remember the sizes of some of this tackle, like with drop shot weights for instance. I created little tabs to pull these out with by simply folding a piece of tape part of the way over onto itself and then attaching the sticky tag end of the tape to the container.
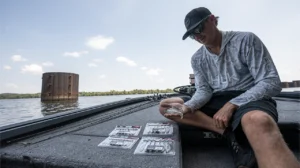
Lots of hooks also come on little cards now, which can be used to help organize your terminal tackle. Just leave the hooks on the card but cut the card down a bit so you can fit several into your box. This will also help you remember what size to order when you need new ones. If you have to cut the size off the card to make it fit, go ahead and write the size of the hook on the part of the card that is left and you’ll be glad you did later.
Final thoughts
With a little effort and ingenuity, you can make yourself a pretty affordable and effective terminal tackle box to protect your gear and keep it handy and organized for when you need something. Using a waterproof box is a good idea but not a necessity. By simply cutting chunks out of a pool noodle and drilling holes and cutting slits into them, you can easily modify your box to fit your needs.
Don’t be afraid to think outside the box as well though by incorporating more than just foam into your design. Using some of your terminal tackle’s original packaging will help at times and repurposing other small containers designed for things outside of bass fishing can really perfect the layout of your terminal tackle box. If your fishing gear is in a mess, give this a try and I think you’ll be glad you did.


