This is a quick tutorial to make your own fishing rod protectors for $1-2 a sleeve. You can buy the material for about $20 for 100 feet and make 15-20 rod sleeves. Here is what you need.
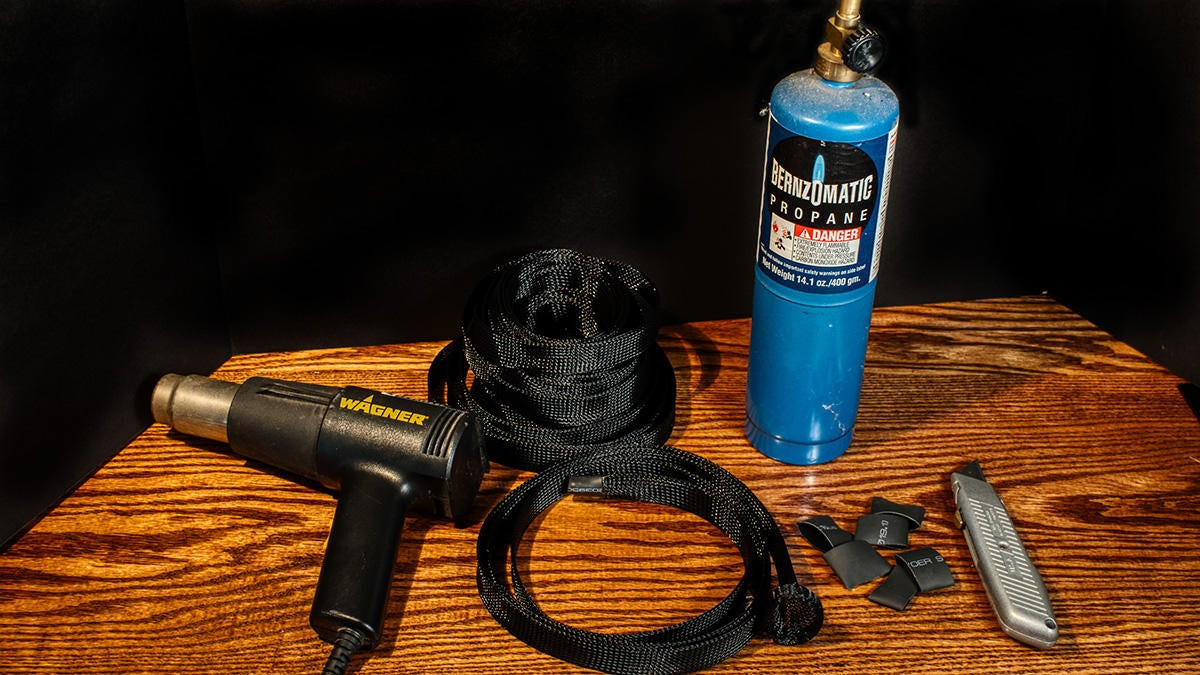
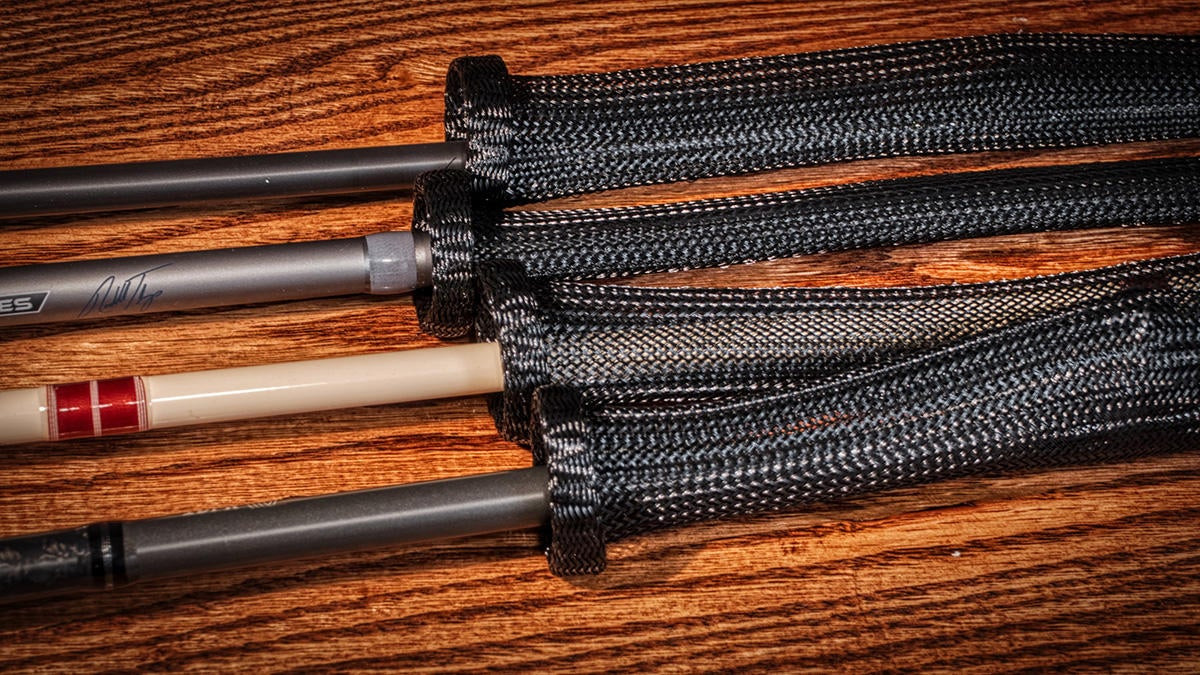
What you need to make your own rod sleeves
Before I begin, I will say you can buy rod sleeves for relatively little money. And I have a bunch in my rod locker I bought from RodGlove. They work great and come in a couple different options, but I like to customize stuff. Plus I get really bored in the winter. I like making longer ones for swimbait rods. I like making shorter ones for two piece crappie rods. I like to make tight ones for smaller rods, for jerkbaits for instance.
Essentially all you need to make your own rod socks is the braided sleeve material, something to cut it with and some way to secure the ends to stop the rod tips from going through the top and the bottom from unravelling when you slide it over your fishing rods.
But I suggest the following 4 items to make your rod sleeves yourself:
- PET Braided Cable Sleeve
- Razor blade or rope knife
- Heat shrink or thread
- A heat source like a heat gun or torch
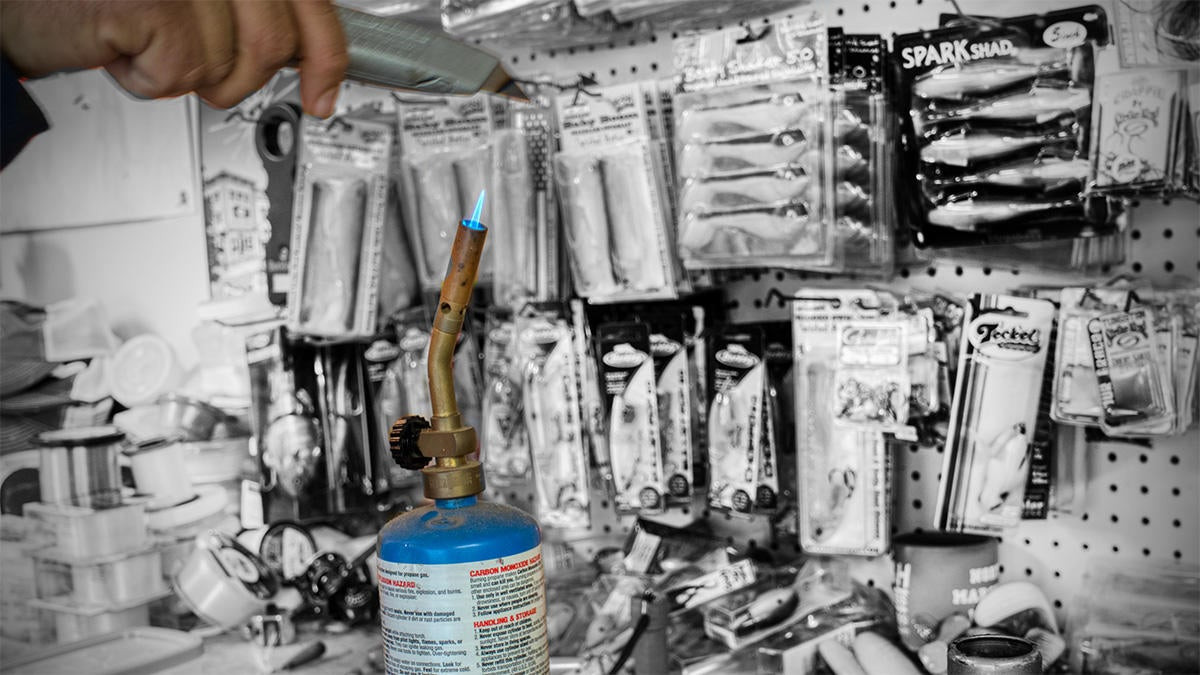
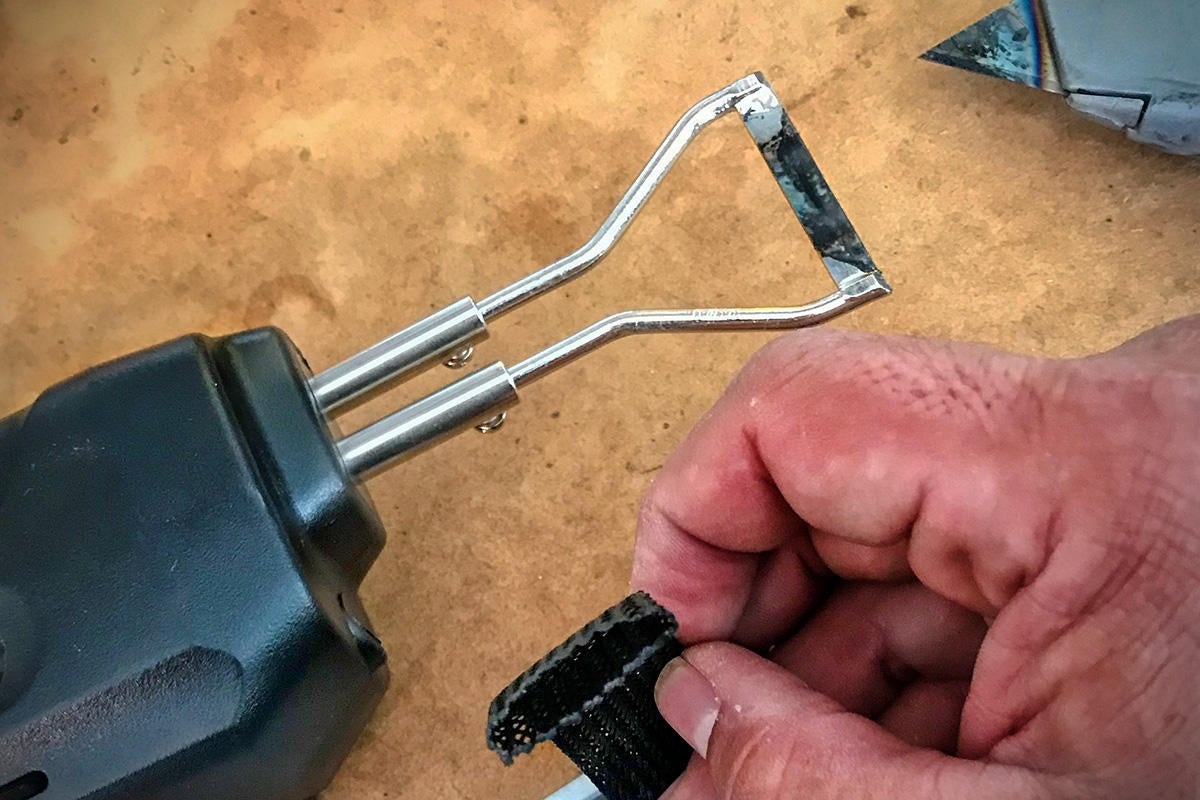
Cut the material with a hot blade
Personally I prefer a device called a hot knife or a rope cutting gun. But you can cut the sleeve material easily by heating up a razor blade with a small propane torch. The reason you want to cut it with a hot blade is because it will fuse the ends of the material as it cuts. This will keep the fishing rod sleeve from fraying as you fold or roll the end.
Cut the sleeve quick and open it up
I usually try to open the sleeve up immediately after I cut it. At least do that with one side because the rod needs to go in one side of the sleeve. Again a hot blade cuts this material a lot easier than a regular razor blade. You can cut it with scissors and try heating the ends, but I’ve never had good luck with this approach.
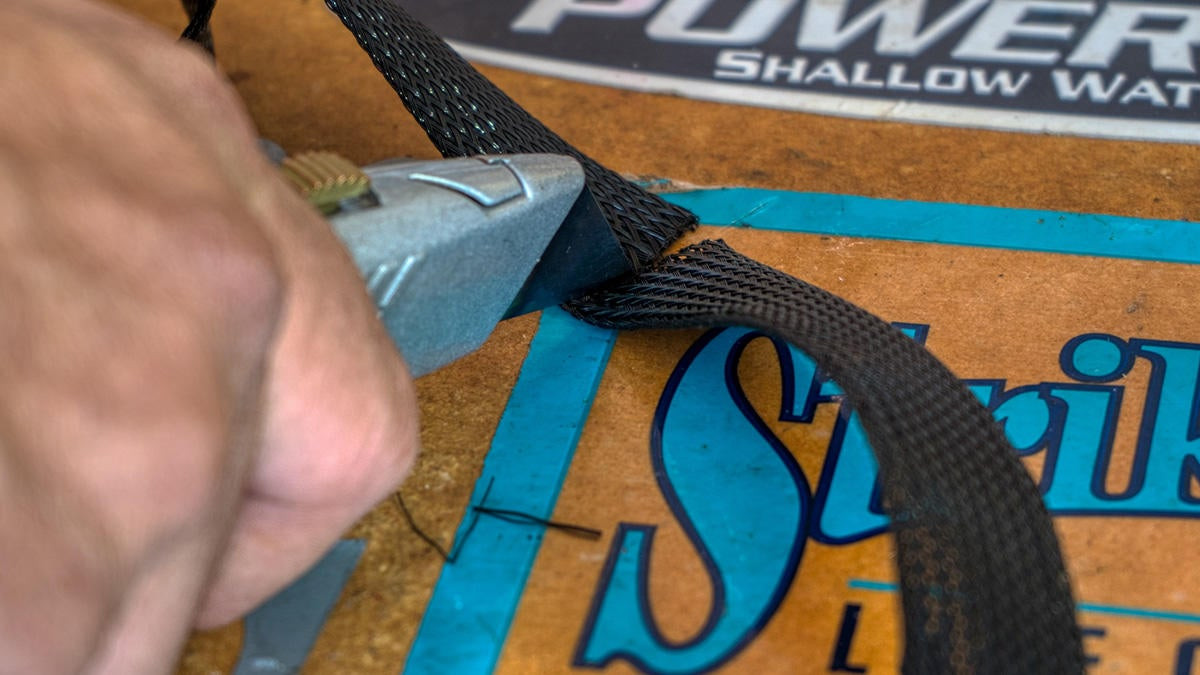
Rope Cutting Gun works best
I picked up a rope cutting gun at Amazon.com. Basically all it entails is a soldering iron that has a blade between the contact points that is heated up. You press it down onto nylon rope, or in this case the braided sleeve, and pull the trigger. It cuts and fuses the end of the braided material at the same time, making it a lot easier to work with without fraying. The larger rod sleeve shops probably use an industrial electric rope cutter.
Hot cut makes it quick and easy
As you can see here, the rope cutting gun cuts a really nice fused end of the sleeve and makes it super quick to work with. But I’ve made plenty of fishing rod sleeves with a $1 razor blade box opener and a torch I have in the shop.
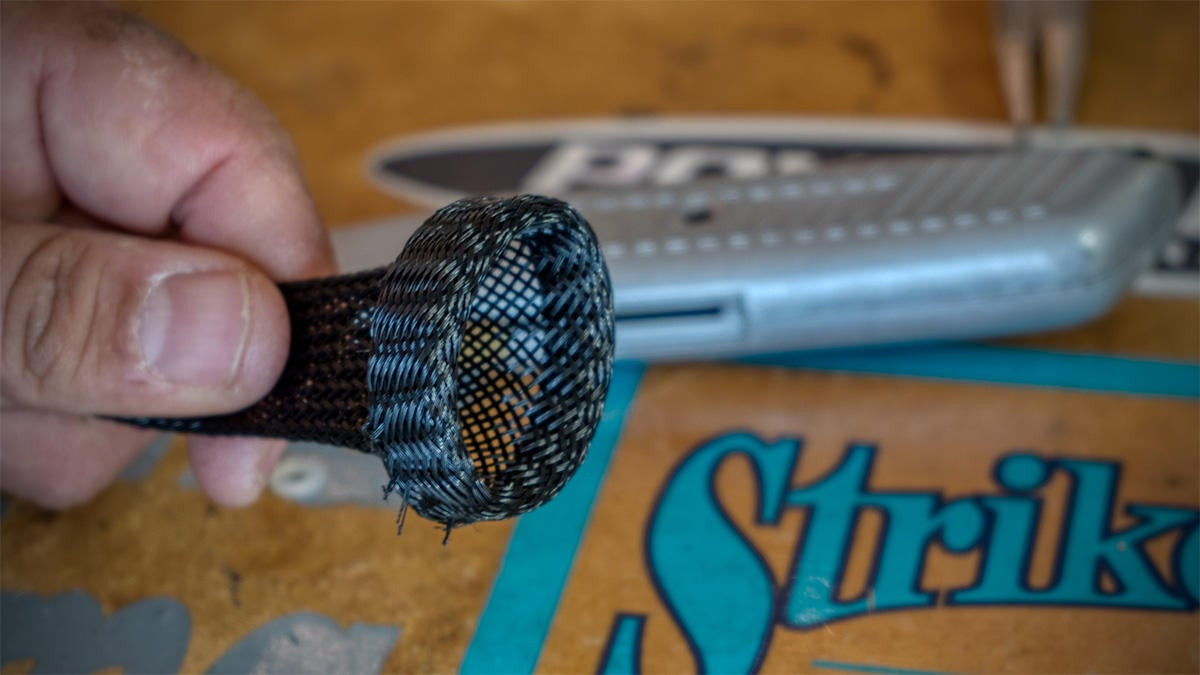
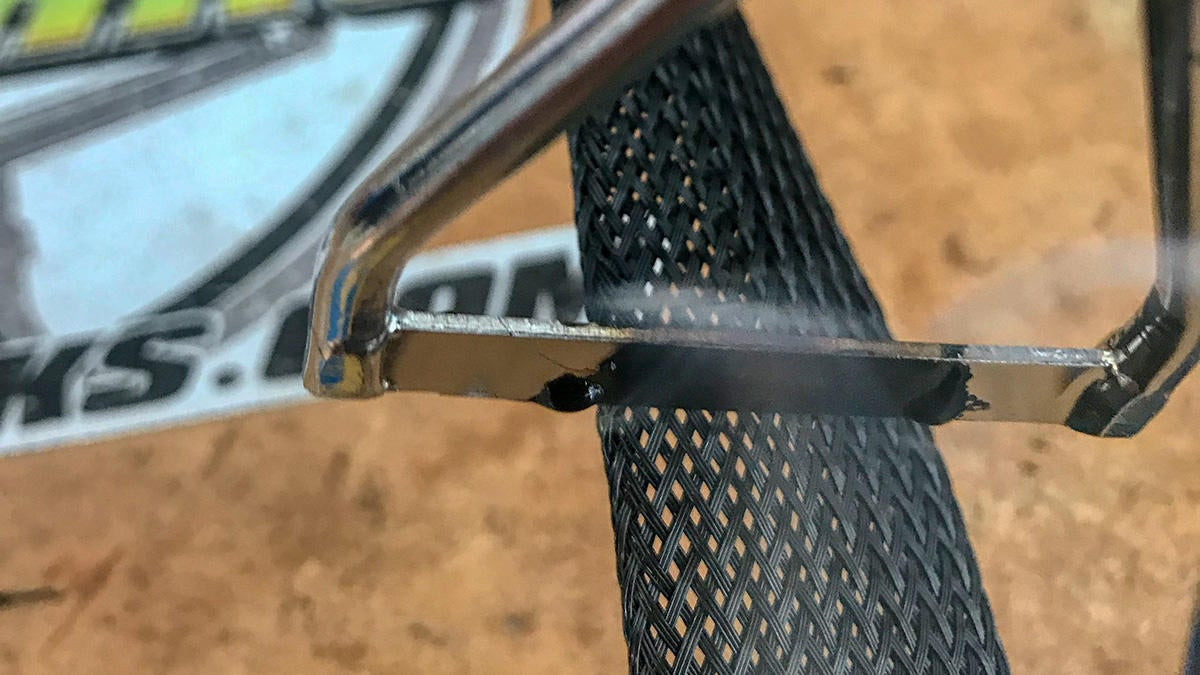
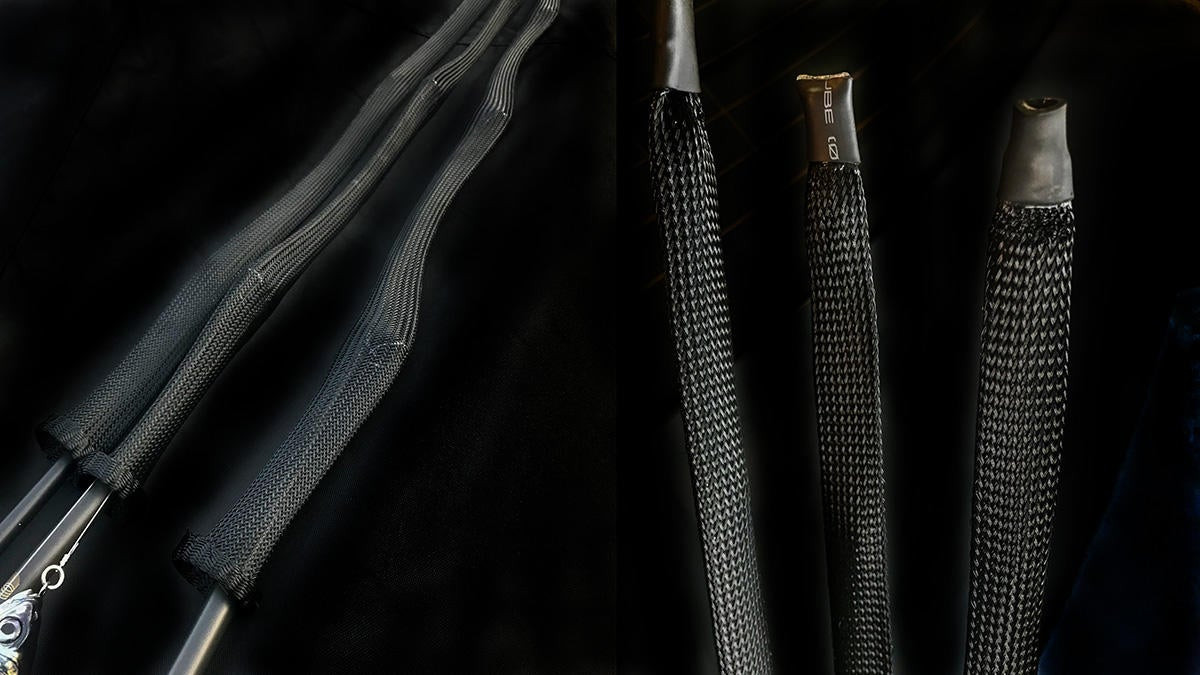
Fold the bottom end in and crease or roll and sew
You can create the opening to the rod sleeve a couple different ways. You can fold it in on itself and pinch a crease all the way around. Some people will do this with heat as well. But I’ve done it just folding it in and creasing with my fingers. Lately I’ve been folding it about a 1/4 of inch outward and doing that two or three times to get a nice wrapped end.
Then if you take some thread you can loop it through a few times and keep it from unravelling quick and easy.
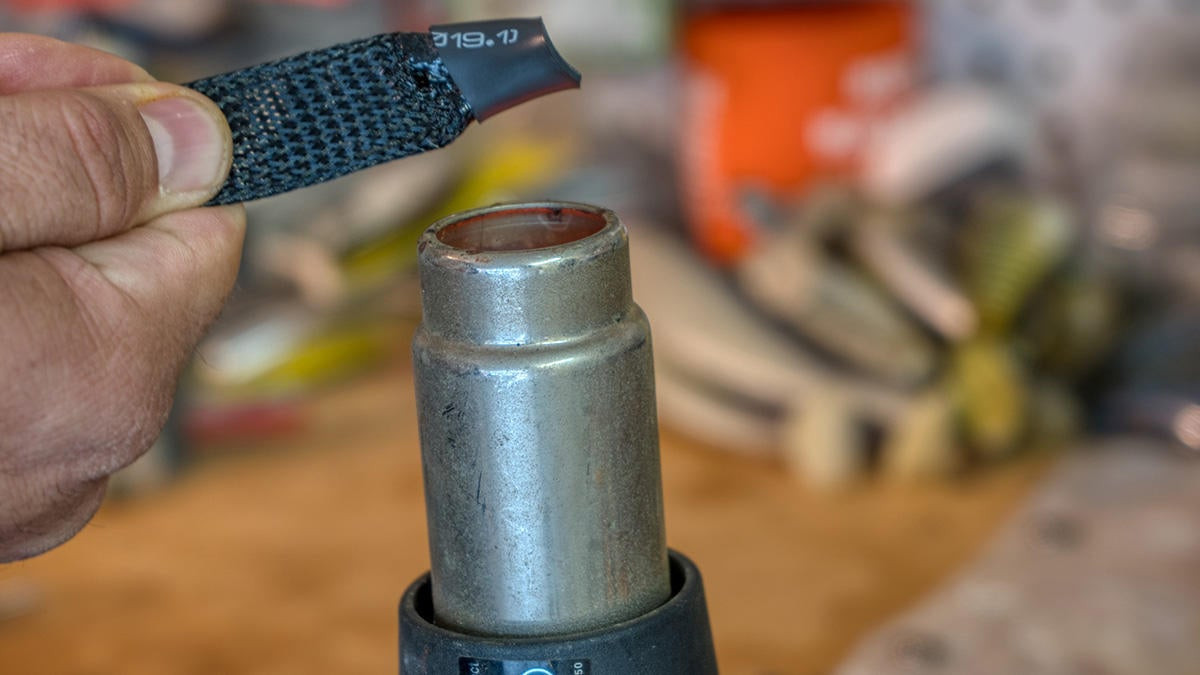
Heat Shrink or sew the tip
Some people will sew the tip of the fishing rod sleeve closed. I prefer to just take a 3/4-inch of heat shrink seal the end closed with heat shrink and my heat gun. You can do this with a lighter and heat shrink material as well.
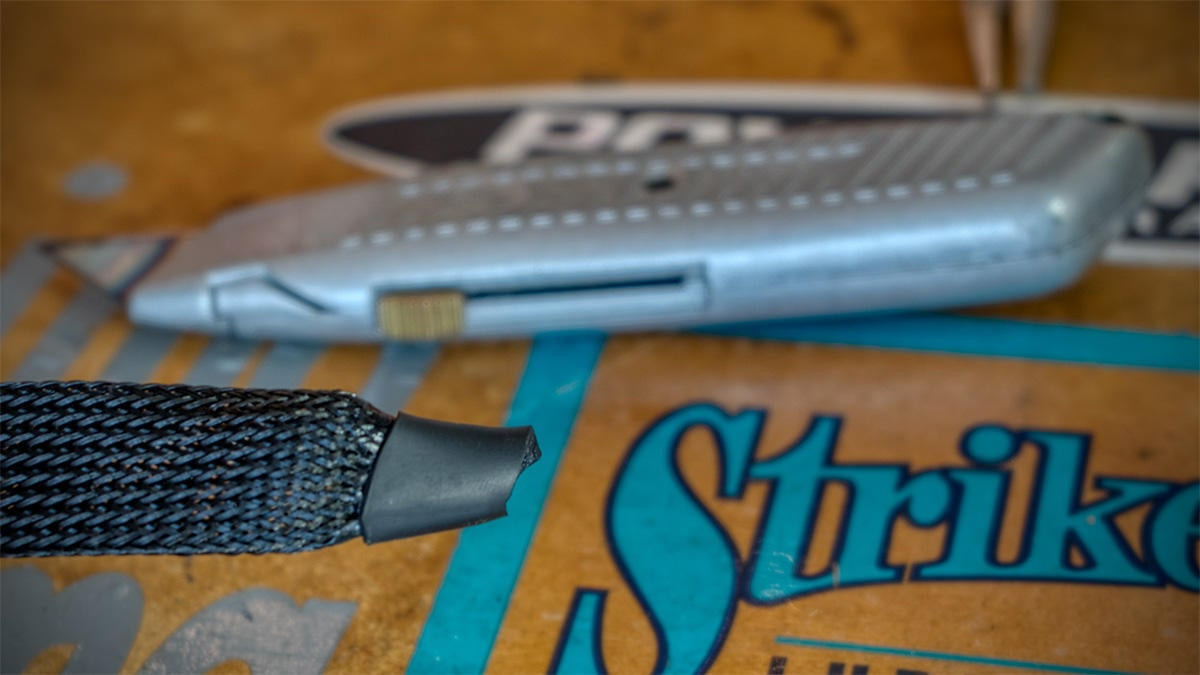
Heat shrink is fast and easy
The heat shrink closes the end down, and when it hardens, it keeps the fishing rod from poking through. You can take a pair of pliers and pinch the end of the heat shrink closed. If you have real small tips with tiny micro guides, you might want to pinch it closed, but most of my rods don’t poke through with just the heat shrink on the end after it hardens.

The finished DIY fishing rod sleeve
I have made several dozen fishing sleeves now. Once you get the hang of it and figure out how long you want to make the sleeves, you can gut, fuse and roll one in about 5 minutes.
I will sometimes slide the sleeve down on a rod to make it fit exactly like I want on a rod. Or I will just measure it against one I already like the length on. Most of the time I want it to cover all the guides but stop short of the hook hanger on the rod by the size of the bait I think I will hook there.
I use the 1-inch size of PET braided cable sleeve most of the time. I like that it fits a little more snug on the rod so when I pull rods out of the rod locker or grab them out of the truck the sleeves don’t just fall off.
I also use 1 1/2-inch size as well. You will need the wider options for spinning rods to get over the bottom feeder guide.
Stick with black to save money
You can get the PET braided cable sleeve from electrical wiring houses in various colors. But size and color can drive the price up a lot. If you buy it in bulk in black on places like Walmart.com, you can get spools as cheap as $16 for 100 feet and make 15-20 rod sleeves out of that.
Of course you can buy fishing rod socks from various manufacturers, and if you just have a few rods, that’s the best option. But if you’re like me, and have dozens of rods to protect, it can get costly buying sleeves at $8 a sleeve.
Hope it helps other anglers save some money and I’d love to hear other tricks you’ve found making your own rod sleeves.