Texas rigs are extremely popular among bass anglers and there’s a good reason for it—they catch big bass throughout the entire year. Whether you’re fishing shallow cover in a small pond or deep brush piles on a large reservoir, this popular rigging method will often produce consistent bites when other techniques fall short.
Although you can certainly catch bass using traditional Texas rig components, learning to slightly modify your rig for specific situations will result in more fish, fewer heartbreaks and less hassle. These five modifications might seem simple, but they can make an enormous difference in your Texas rig fishing success
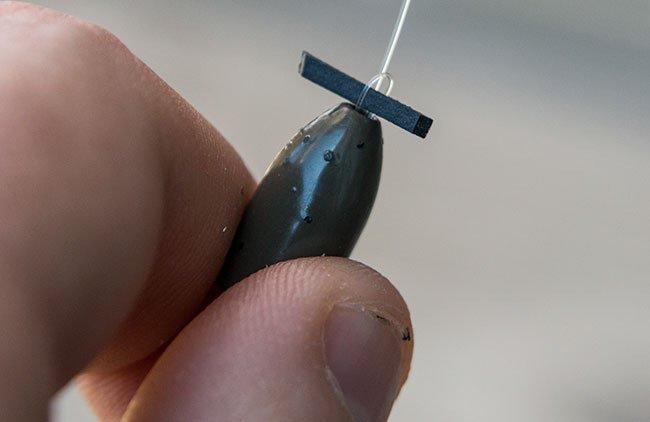
Use a rubber band when you’re in a pinch
I’m a firm believer in pegging the weight on my Texas rig—especially when I’m flipping and pitching shallow cover. Not only does it allow both the bait and weight to fall as one cohesive unit to avoid hang-ups, but it also keeps the weight from bouncing against your knot.
A lot of anglers like to peg their weights with a toothpick and to be quite honest, it makes me cringe. Whenever you jam a jagged piece of wood in-between your weight and fishing line, you’re bound to experience premature line fraying, weak spots and serious crimping issues; all of which are ingredients for break-offs and lost fish. Rubber bands, however, are an inexpensive and safe alternative for pegging your Texas rig.
Here’s how.
- Go ahead and rig your Texas rig like you normally would, but leave your weight unpegged.
- Take a one-foot piece of cheap monofilament line and thread it through your weight, starting from the bottom (the widest part of the weight).
- Insert that same end of the monofilament back through the top of the weight. This will create a small loop.
- Insert a 1/4-inch section of rubber band into the loop.
- Grab both ends of the monofilament—now on the bottom of the weight—and pull downward. The rubber band will be inside of the weight.
- Pull one end of the monofilament line until the entire piece of line is out of the weight.
- Your rubber band is now lodged inside of the weight and your weight will not move.
It’s important to use monofilament line to insert the rubber band because it will not burn itself on your main fluorocarbon line. The rubber band will not fray or crimp your fishing line and this will allow you to make precise pitches and flips to heavy cover with confidence.
Use Plasti-Dip to revive chipped tungsten weights
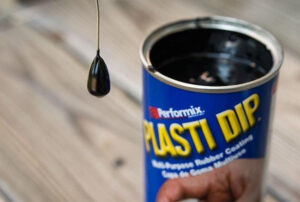
If you pitch and flip enough cover, you can expect to chip the paint off of your tungsten weights eventually. Whether the bass’ teeth scrape the paint off or you make a few bad casts into a dock, it’s going to happen to everyone. Instead of tossing them in the trash or trying some impromptu fix with a permanent marker, dipping them in Plasti Dip can revive your old weights and save you a lot of money.
It’s important to understand, however, that this rubberized coating will cause your tungsten to lose a bit of sensitivity. This modification isn’t for everybody, but there are a lot of anglers, our own Terry Brown included, who swear by it. If you’re tight on money, this will help to keep you fishing.
You can find this stuff at any hardware store and I think I paid about $6.00 for a big container of it. It’s available in almost every color you can think of, but black will work in most situations.
Here’s how you do it:
- Straighten an old paperclip and thread your chipped tungsten weight onto it.
- Make a small bend in the paperclip right below the bottom of the weight to hold it in place.
- Dip the weight into the Plasti Dip for about five seconds. Try to be very still to avoid any bubbles.
- Slowly remove the weight and hang it in a dry environment overnight.
Now be warned, this Plasti Dip stuff smells pretty funky when you first open it, but the smell won’t be an issue after it sits overnight. I also recommend using rubber gloves because take it from me—it’s not fun to have plastic fingers.
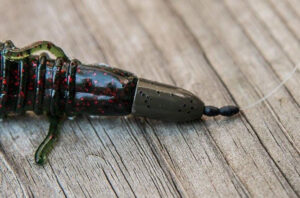
Use a bead for added sound and knot durability
For whatever reason, it seems like a lot of anglers overlook the importance of adding sound to their Texas-rigged soft plastics. Sometimes I’ll insert small glass rattles into the plastic, but I really like adding a glass or plastic bead. It adds a just the right amount of sound while also protecting the knot from the weight.
It only takes a few seconds and it can make a really big difference, especially when you’re fishing in muddy water.
Slide your weight onto your fishing line and put your bead right behind it. You can use a clear, red or orange bead—I honestly haven’t seen the color make a huge difference.
Tie your line to the hook and go ahead and thread your soft plastic bait onto the hook.
If done correctly, your Texas rig should look very similar to the photo. Because I prefer a pegged weight, I added a rubber bobber stop right above the weight. You’ll notice a small gap between the peg and the weight—I do this on purpose because as I hop the Texas rig along the bottom, the weight will collide with the bead and create a really cool “clacking” noise that the bass often mistake for a crawfish.
Add an extra bobber stop when skipping underneath cover
I get a lot of questions from fellow anglers about skipping soft plastics underneath overhangs and docks. In my opinion, weight movement is the biggest issue I see when I’m teaching people how to skip. If your Texas rig doesn’t make contact with the water as one cohesive unit, you’ll have issues with big splashes, inaccurate casts and “ringing the dinner bell” by slamming your weight into the dock or nearby pontoon boats. Because skipping is a game of stealth, you want to avoid any extra disturbance at all costs.
To allow for effortless skips, I use two Eagle Claw Bobber Rubber Stops whenever I’m fishing docks. They’re easy on your line and they very rarely move out of place. This setup allows me to skip even the bulkiest creature baits with ease into areas that many anglers overlook. You can hit it against anything and your weight won’t move. Again, it’s a really simple modification, but it makes an enormous difference.
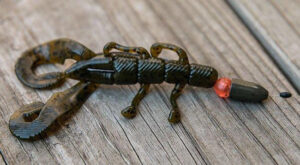
Keep your soft plastic in place with a toothpick
Durability can be an issue whenever you’re using soft plastic baits. Some baits move very naturally in the water and catch a bunch of bass, but it’s tough to keep them from balling up on the shank of the hook. After a few skips or a couple of pecks from overly ambitious bluegill, it can be difficult to keep your Texas rig intact which can do a lot of damage to your hookup ratio.
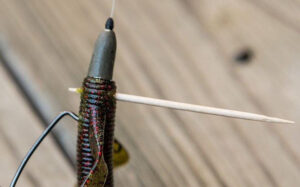
To combat this common problem, you can actually use a toothpick to keep the head of your bait connected firmly to the hook. I know this photo looks strange, but I decided against trimming the toothpick so I could give everyone a better look at the setup. I’ve never noticed any increase in break-offs with this modification.
Here’s how you do it:
- Rig your Texas rig like you normally would.
- Slide the head of your soft plastic over the eye of the hook, covering it completely.
- Insert a toothpick into the head of your soft plastic, through the hook eye and out the other side of the soft plastic.
- Trim both ends of the toothpick so they’re completely concealed by the soft plastic.
- Save the remainder of the toothpick so you can repeat the process the next time you re-rig.
Texas rig fishing isn’t necessarily difficult, but there are some common frustrations associated with it. These five simple modifications, however, will make your life much easier, extend the lives of your favorite soft plastics and save you a lot of money over time.