

Organizing your bass fishing soft plastics doesn’t have to be confusing, daunting or frustrating. Although it may seem like a bunch of mind numbing labor, I’ve been using a simple organization system that allows for much easier and more modular storage.
This system has given me 5 major advantages since implementing it.
- Find what you need in a hurry—Fishing is a time-sensitive sport. When a group of bass gets fired up, you need to be able to re-rig and continue casting within a few seconds. Your preparedness often correlates directly to your success.
- Lighten your load—There’s no sense in carrying hundreds of extra pounds in soft plastic baits when you’re bass fishing. It slows down your boat, hurts your fuel mileage and negatively impacts your ride in rough water. If you have the bass dialed in, grab the baits you know they’re eating and get out there.
- Portability—If you fish team tournaments with a partner and alternate boat use between tournaments or lakes, you don’t have to dig through all of your compartments when transferring your gear into another boat. Simply grab what you think you might need and get it done in less than five minutes.
- Easy inventory—We all do it. Every bass angler buys multiple packs of the same baits that they don’t really need. Over time, you’ll probably find ten full packs of identical baits and colors. That wastes money and space and this system helps you keep an eye on your spending habits.
- Affordable—I organized all of my soft plastics for under $10. No expensive, bulky, space-wasting plastic totes. Just one inexpensive trip to the grocery store will take care of it.
Step 1: Dump it
It’s probably going to drive you crazy—even though your soft plastics are in major disorder, you always knew where your favorite color “might” be located. Try to get over it because something better is on the horizon.
Go through your boat or tackle storage area and put every bag of soft plastics you own into a big trash bag. Lug the trash bag to your work area—about eight or ten square feet will do—and dump it like a bad date. If you’re a tackle junkie like we are, you’ll probably be shocked by the amount of baits you own that have never been used. This process will help put things into perspective for you.
Step 2: Categorize broadly
Like all of these categorizations, yours will probably differ from mine. We fish different lakes, travel different places and favor different fishing styles. As long as you begin with the broadest categories you can think of, you’ll be just fine.
I organized mine in a very simple manner. After dumping it all onto the floor, I separated it as follows.
- Paddle tail swimbaits—Because I fish a lot of dirty water, I don’t use swimbaits very often. As a result, I don’t keep very many in my collection. The packages were fairly large and easy to cherry pick from the pile, so I pushed ’em off to the side.
- Toads and topwater soft baits—Again, this type of fishing isn’t very conducive to my style and home fisheries, so I shoved these baits to the side in their own little pile—primarily to get them away from the “meat” of my project.
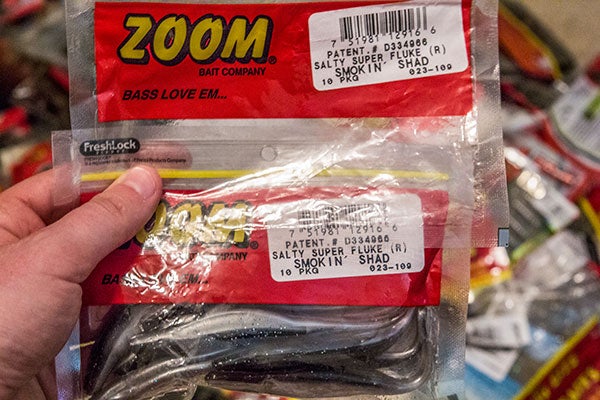
- Soft jerkbaits—These were already semi-organized—by that I mean piled in a few ripped Kroger bags—so I set them to the side. You probably have a similar situation with different types of baits, so try it out.
- Worms—It didn’t matter what kind of worm it was for me. If it looked like a worm, I put it in a pile, throwing color, style and application to the wayside for the time being.
- Creatures—For the sake of simplicity, I considered everything I would flip, pitch, use as a trailer or drag behind a Carolina rig a “creature”. If it had appendages or didn’t look like a worm, this is the pile I put it in.
- Step 3: Separate it further
I could tell you this part is fun, but I’d be lying. I’m not a tinkerer, so my attention span with tedious categorization tasks is limited at best. With the help of a few cold beers and Pandora radio, however, I got it done in about an hour. Once you get past this part, the following steps will be much easier.
Before you go into robot-mode and start throwing little plastic baggies everywhere, it’s important to consider both your fishing style and how your mind works on the water. What are some of your favorite techniques? What do you consider a “craw”? How does that differ from a creature bait? There’s no right or wrong answer—whatever works best for you.
I’m a visual thinker, so I pulled up a Word document on my computer and made a bullet list to help me get my proverbial ducks in a row. Again, keep in mind—everyone’s list will be different. I suggest using my list as a simple guideline to your own organization system. Feel free to place your favorite, most heavily used baits into their own category for added convenience. You’ll notice a few instances in which I did it.
- Flipping and pitching
- Toads and topwater
- Cut tail and speed-type worms
- Curly tail and big worms
- Soft jerkbaits
- Paddle tail swimbaits
- Stick worms
- Finesse and shaky head
- Trick/floating worms
- Lizards
- Craws, chunks and trailers
- Zoom hogs (Brush Hogs, Baby Brush Hogs, Super Hogs and Z Hogs)
Step 4: Subcategorize by color
https://s3media.247sports.com/Uploads/wired2fish/2014/02/label-your-bass-fishing-soft-plastics.jpg

If you know your favorite lake is the color of chocolate milk, there’s no need to pack your more natural-colored baits. This is why I chose to subcategorize each major category by color. It allows me to pack lighter, have more room in my boat and I don’t have to dig through a bunch of irrelevant colors to find what I’m looking for. It also makes it much easier to pond hop on the weekends if the bass in your favorite honey holes fancy particular colors.
I decided to keep it simple by making two subcategories. I don’t get too carried away with color selection with my soft plastics, so it was an easy decision to make.
- Light-colored—I put anything green or natural-colored into this category.
- Dark-colored—Anything I use in dirty water, primarily blues, blacks and purples were considered “dark”
Step 5: Consolidate and wipe down

This step will save you a ton of space. I had several packs full of one or two specific color and style of baits, so I combined them all into one bag. Instead of a pack holding 10 baits and a bunch of air, I filled ’em to the brim. After about 20 minutes of consolidating my baits, I was left with an enormous pile of empty plastic baggies and a better understanding of what colors I don’t need any more of.
It’s also a good idea to take this opportunity to wipe down your soft plastic packages. Over time, they’ve probably been “slimed” by bass or greased-up by a leaky can of crawfish spray, so keep a wad of paper towels nearby. This will keep your baits from swelling and, in some cases, rotting and becoming useless.
Step 6: Bag each subcategory and label

Remember when you separated each category by color? Now is the time to bag them and make ’em look pretty. This is the easy part when everything comes together.
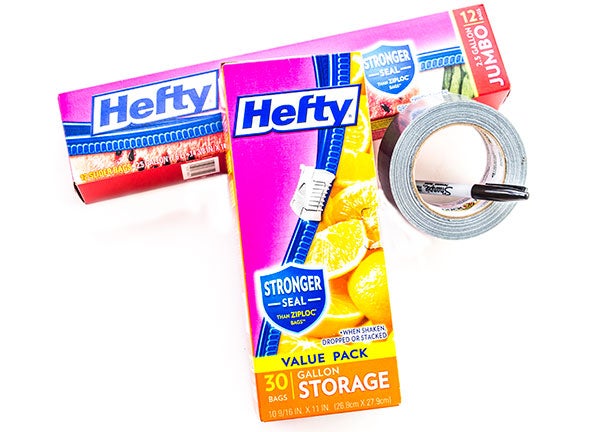
I decided to use one-gallon Hefty storage bags when bagging by color. These bags are tough as nails and protect your baits well. If I had more than would fit into one of these bags, I put them in a separate storage area. I don’t need that many baits at one time, so I figured it would be best to get them out of the way until I need to restock.
After bagging, make sure you label each storage bag with a permanent marker to avoid any confusion or duplication of effort. For example, I’d label a bag “dark soft jerkbaits”.
Step 7: Combine into larger bags and label
https://s3media.247sports.com/Uploads/wired2fish/2014/02/subcategorized-soft-plastics.jpg

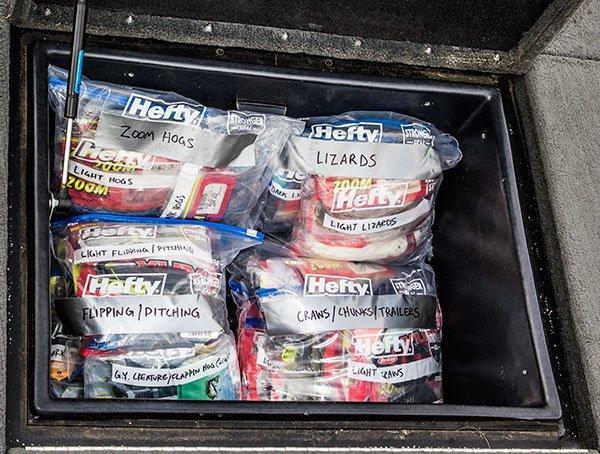
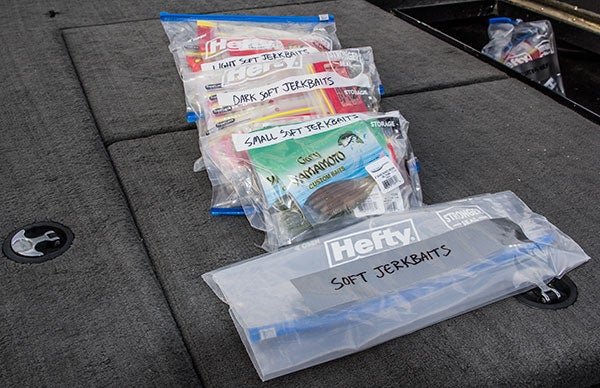
This is the final step and the easiest part of the whole production. For my larger bags, I used 2 1/2-gallon Hefty Bags because I can fit about three of the smaller bags into them.
Label your big bag with the categories you developed in Step 3 and put your subcategorized bags inside of them. I suggest labeling a big piece of duct tape on these bigger bags for easy identification while on the water. Step back and check it out—you’re now a more organized, efficient and mobile angler. Feels pretty good, doesn’t it?
Spring will be here before we know it and this is the best time of the year to get organized, take inventory and prepare yourself for the hustle and bustle of fishing season. This storage system has worked for me and I believe it will help you fish more efficiently and reduce your frustration.

