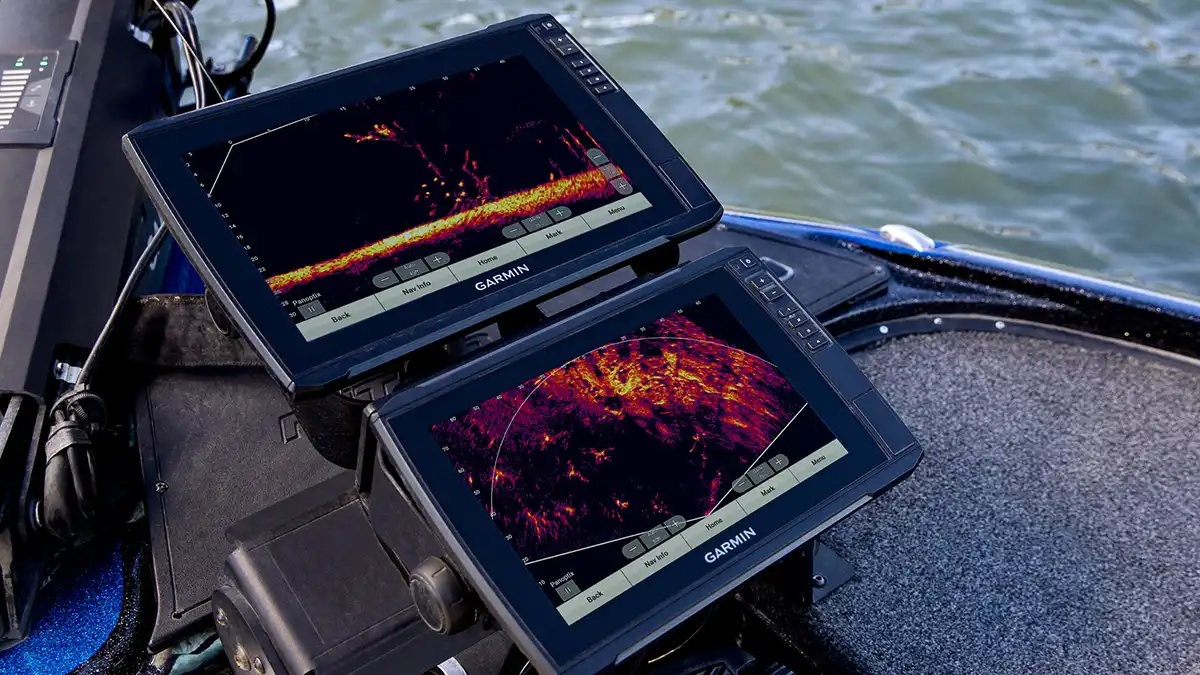
I’ve been sharing some of my fishing screenshots from my Lowrance HDS Carbon units recently on the Wired2fish Instagram page, and I’ve had a lot of messages from people wanting to know how I get such clear shots and how my screenshots show fish that actually look like fish. The answer is two fold.
So I’m creating two separate articles. This one will cover the process I actually take to get the image while on the water. Then I’m also writing a piece on how to make sure your units are setup optimally to get the best quality imagery out of your graphs.
Modern day fish finders are a lot like televisions. There is literally one to fit every budget. While you get more resolution and quality as you go up in price, you can still get pretty good shots with the more affordable units if you get the process down for taking a good image on the water.
My process is pretty simple, and it does depend on a few conditional factors but it’s basically the following:
- Pre-scan the area
- Figure out the best path
- Control drift across
- Make sure it’s calm
- Change screens often
- Utilize Track back and zoom
Pre-scan or rescan
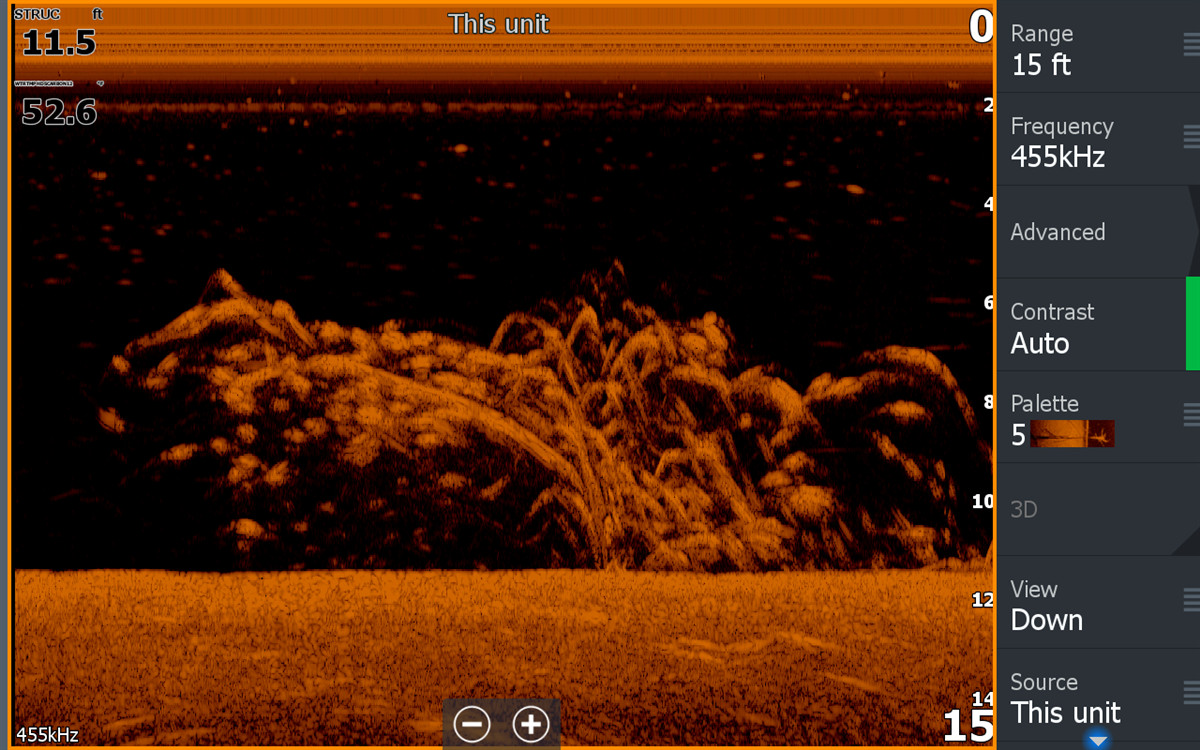
The easiest answer to how I get cool screenshots is the same way I get cool photos. I’m scanning when something cool is happening. Just like I have my camera when there is something compelling to take a picture. So scan a lot and you will encounter some cool stuff on your screen.
When I find something cool, I will scan around on the area to either determine how it lies on the bottom or how the fish are setup on it. So either I know there is a cool area already and I scan around to see if anything interesting is happening, or I will be scanning new areas and come across a cool looking spot. And I’m usually focusing on the down looking technologies like 2D sonar or Down Scan or Down Imaging.
Figure out your path
Once I know something is worth shooting, I figure out the best way to go over the spot that gives me the most bang for the buck. In other words, what path across the spot can I get the most coverage and detail. That’s a trial and error thing. Most of the time you can just snap screenshots as you go different ways and you will see one direction you like the best.
Control a drift across
Usually when I take the cool screen shots I am actually on the trolling motor and I will get on my line and start trolling in the line I want and then let off and let the boat slowly coast across the spot. I’ve found this is the best way for scanning fish where you can really maximize the details and the features. A slow drift across them gives you that added detail in the down and side imaging technology.
Again it’s a trial and error thing. And I will shoot a shot with my front graph, then run back to my back graph and shoot a snapshot of it, if I don’t have the unit on standby. But the speed is everything. If you go over something fast, it’s going to be shorter and less detailed. If you coast over the spot, it has time to draw the finer details. If you go to slow it will blur and streak. So there is a fine line. But really if you just get out and play with it, you will pick it up.
Waves kill your quality
If it’s not real calm and there is a lot of wave action, you are going to get a lot of zig zags in your image. It can sometimes still make a good picture but you just can’t get the detail you can get on a controlled drift on a calm day.
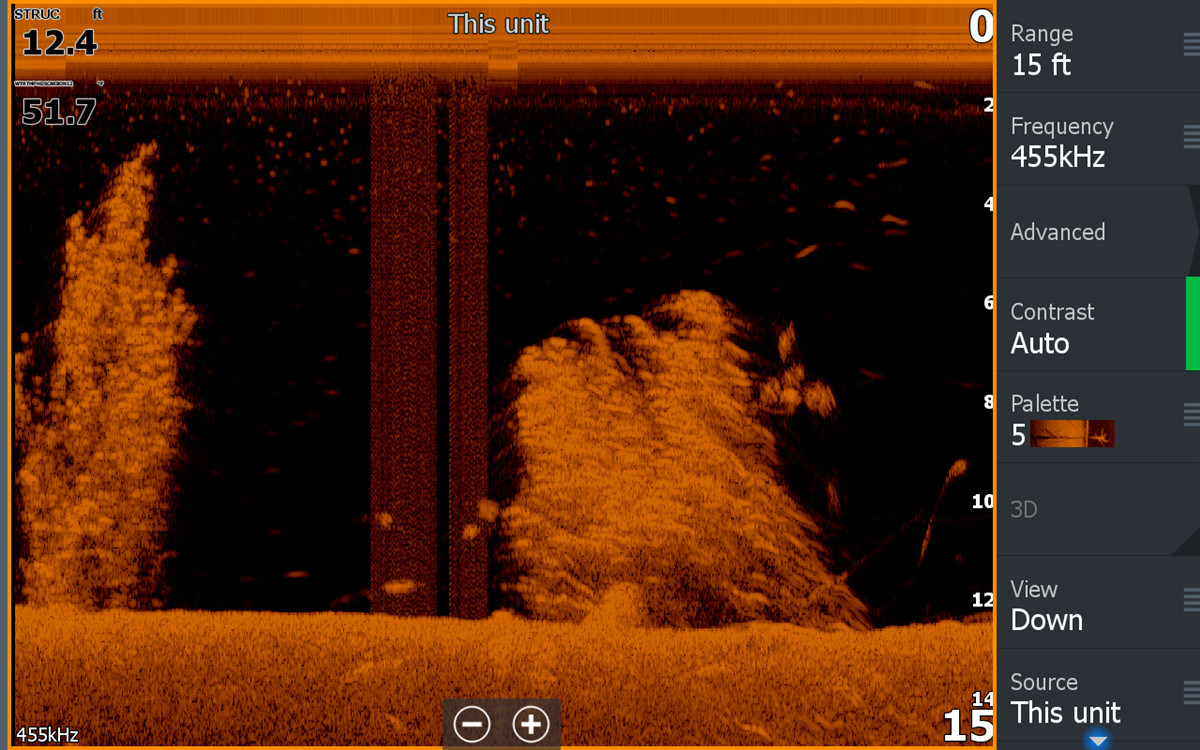
Sample palettes and screens
I am a proponent of trying stuff when there are opportunities to try stuff. So who cares about sampling screens and settings when there is nothing detailed to look at on the screen. Do it when you are on something cool. Some people see better in the orange palette. Some people see better in the blue palette and I know for a fact that sunny and cloudy conditions can change which ones you see better.
But I also think it’s a great learning tool to bounce back and forth between sonar and side imaging technologies. Sometimes I get a shot that looks cooler on one over the other. So keep switching screens and trying different palettes and you’ll likely get one you really like.

Go back and zoom
I often will go over something, then track back on it and zoom in and see some really incredible details that I missed on the first pass. I’ve passed over things I thought were brush piles only to find out they were stumps or boulders loaded with fish when I tracked back and zoomed in.
Obviously the larger screens and newer 3D Structure Scan and Mega Imaging technologies and larger 15 and 16 inch screens give you some incredible detail. But I’ve taken a lot of great shots on 8-inch screens with first generation imaging technologies by just be tedious with my scanning and speed.