I inherited a lot of how I do things from my dad; down to the way I stand and the sound of my voice, according to those closest to us. A love for fishing is obviously another element that got passed down. But that goes beyond time on the water even.
My dad has always loved to tinker with tackle, for hours at a time in his shop, tweaking little things about a bait. Adding a stripe of chartreuse here, cutting a little off a skirt there. Some of it, likely making a bigger difference in his mind than anywhere else since his favorite water color to fish has a clarity level somewhere between motor oil and chocolate milk.
Still, it makes a difference. Not only the definite tangible ones where he likes to clip off the single hook of a buzzbait and replace it with a treble hook for instance. That one has shown definable results. But even the ones that are likely more effective in the mind, giving us a confidence boost knowing that we’re doing something a little bit different from the other 2 billion anglers on the water these days.
Bass fishing is, in large part, a mind game so confidence is key. And doing little things to tweak tackle builds confidence. This is something he’s always done and one of those things I inherited from him.
Today, we’re going to talk about a special project we like to work on during tackle-tweaking season. When the weather gets frigid and the bass fishing action slows down, we’ll spend a lot of time building our own spinnerbaits.
Take a look at our guide on Best Bass Fishing Spinnerbaits.
Why build your own spinnerbait?
Is it necessary to build a spinnerbait from basic components?
Well… define “necessary”.
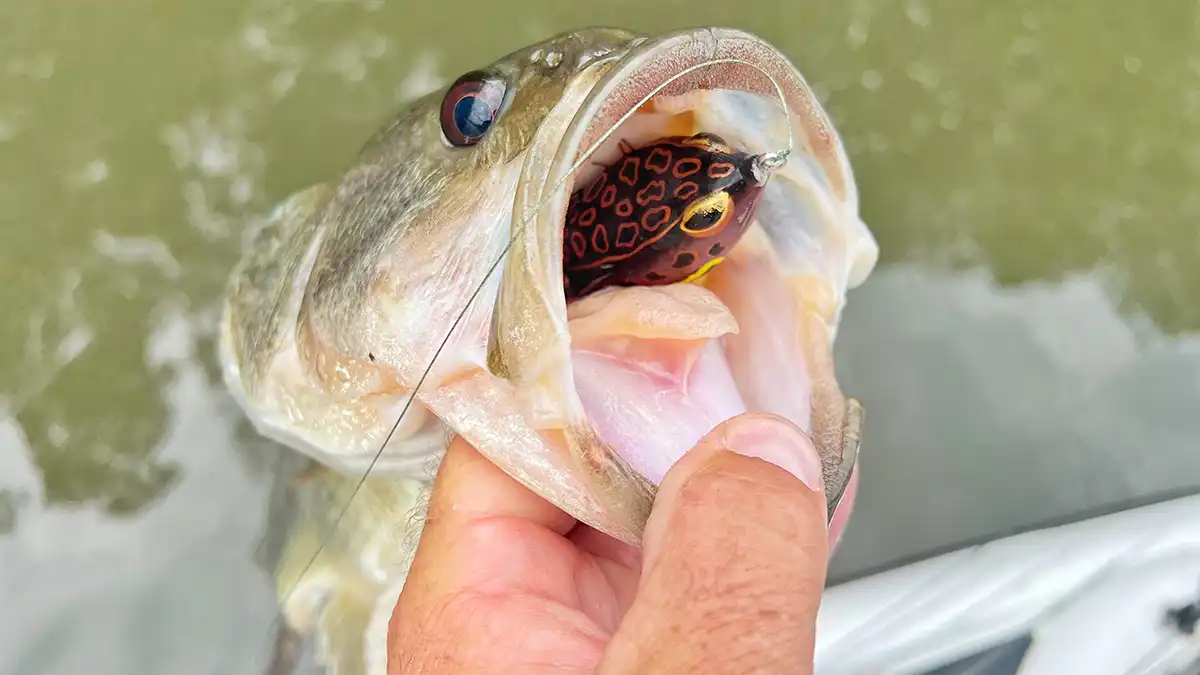
There are dozens of great spinnerbaits on the market these days, so from that perspective, I wouldn’t say it’s necessary. As previously stated, however, it’s huge for your confidence as an angler to build something and catch a fish with it. For many anglers, figuring out how to fish on a budget is a real struggle; some store-bought spinnerbaits cost upwards of $10 nowadays. Honestly, they’re worth it if you have the money and especially if you’re fishing competitively a lot.
However, you can probably make four or five spinnerbaits yourself for that same 10 bucks if you just get a little bit creative. Buying bulk packages of skirts, beads, blades, swivels and the other components necessary to build spinnerbaits will drive down the price of each finished product even further.
If you’re the kind of angler who likes to tinker with tackle, you’re trying to figure out how to fish on a budget or you just like the idea of catching a fish on something you made and getting your confidence boosted, then you should try building your own spinnerbaits. But what does that entail?
Components
We always start with a lead head and wiring harness already assembled. That’s as bare bones as we go but you can pour your own lead heads if you’d like as well. To me, that’s taking it a step further than necessary and opens up room for much more error. You need molds, raw lead and some sort of heating element to melt the lead. To be totally honest, that seems like more trouble and money than it’s worth to me. On top of the added expense, you’ve now opened yourself up to misplacing the wire in the lead and having the spinnerbait run crooked from the start. Instead, we just order the painted lead head, hook and wire harness. All are already assembled together.
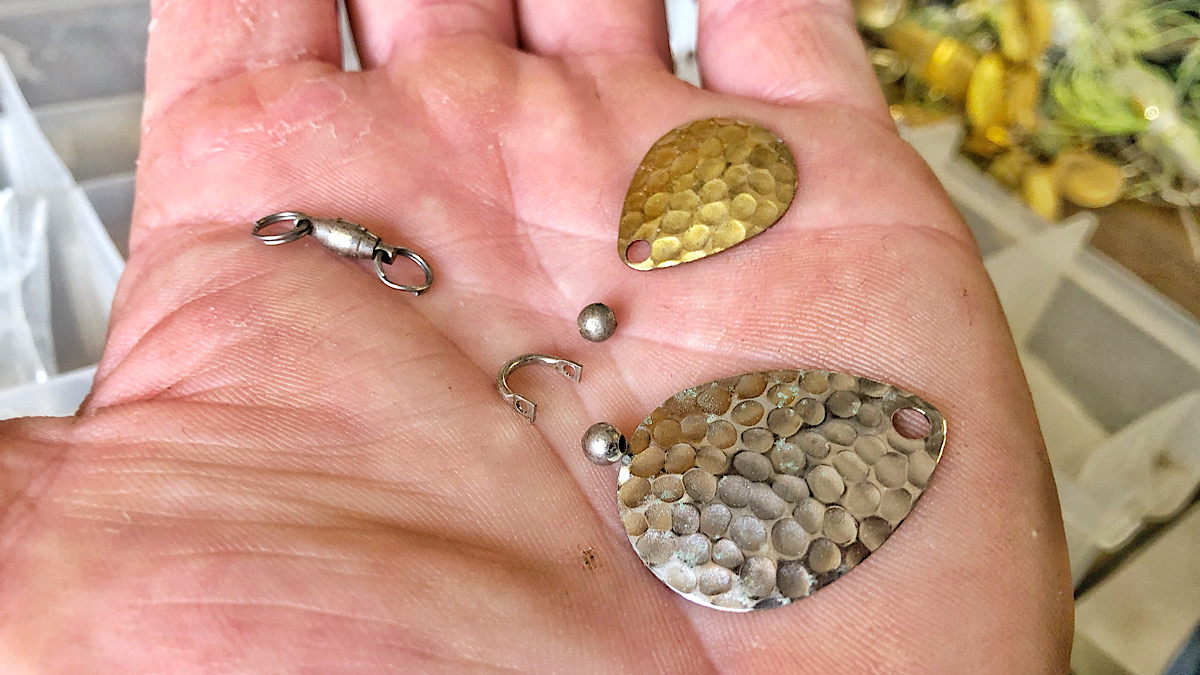
You’ll also need lots of little stuff such as beads, swivels, clevises, split rings and blades. We order all this stuff and the pre-made heads and harnesses from Jann’s Netcraft and to make it simple your first outing, you can just order an entire spinnerbait-making kit if you’d like. But we have specific skirts, heads and blades we use more than others.
One of the biggest expenses you’ll find are the swivels; a good roller and ball-bearing swivel is pretty expensive compared to the other components but it’s also critical to the performance of the spinnerbait. If your swivel is subpar, your blade won’t turn. It’s also important to realize that there’s a budget friendly workaround here, too.
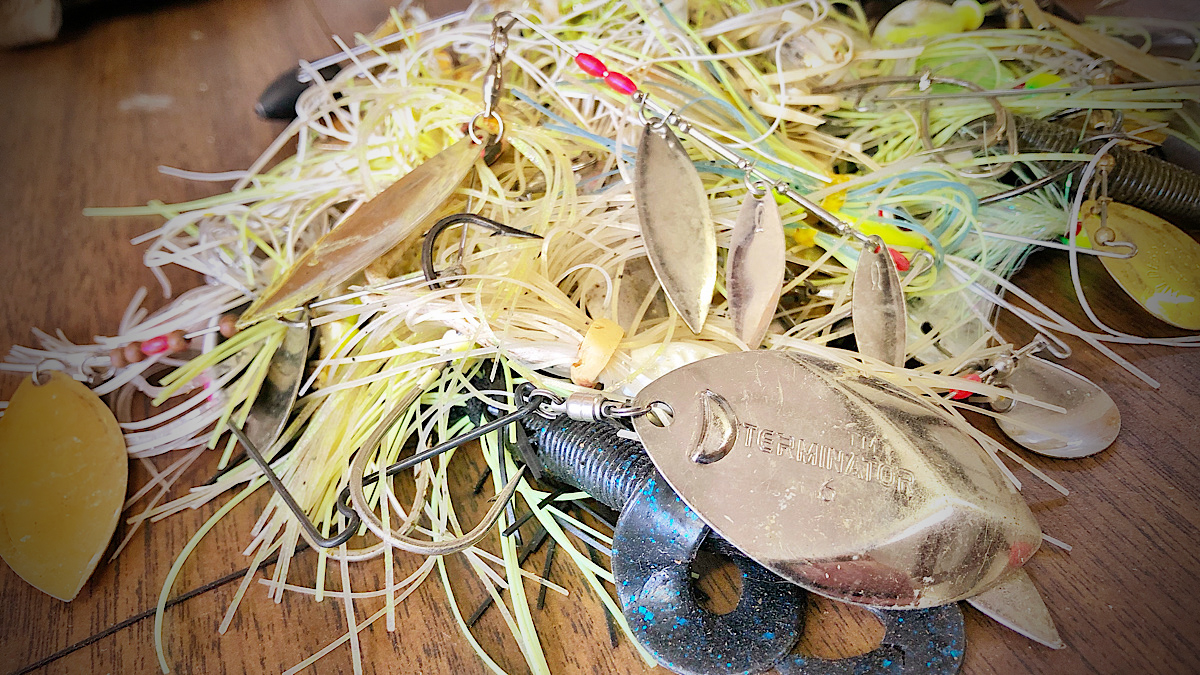
The boneyard
Dad and I fish with spinnerbaits a lot… like a lot, a lot. So whenever we damage the arm or hook of one beyond repair trying to pull it undone from cover, we toss it in the bottom of the boat and eventually into a box in the shop. This collection of old spinnerbaits has a purpose. The beads, clevises, blades and especially the precious swivels can be reused on future spinnerbaits. Again, most of the components are nominal in cost, but those swivels are like gold. So we recycle them time and time again from old spinnerbaits that have made their way to the boneyard.
A good pair of side cutters can be used to cut the wire in two and most of the components will slip right off. The swivel will be attached via a split ring to a loop at the end of the wire. You could technically remove it with a pair of split ring pliers but you definitely don’t want to do that; that’s a good bit more difficult than the alternative and will definitely damage the integrity of the split ring and you’ll have to change it out anyway.
Instead, just take the side cutters and cut the loop of the wire and your swivel will fall free. It’s a good idea to wear glasses when doing this, as the little pieces of wire will go flying at times… better safe than sorry.
Actual build
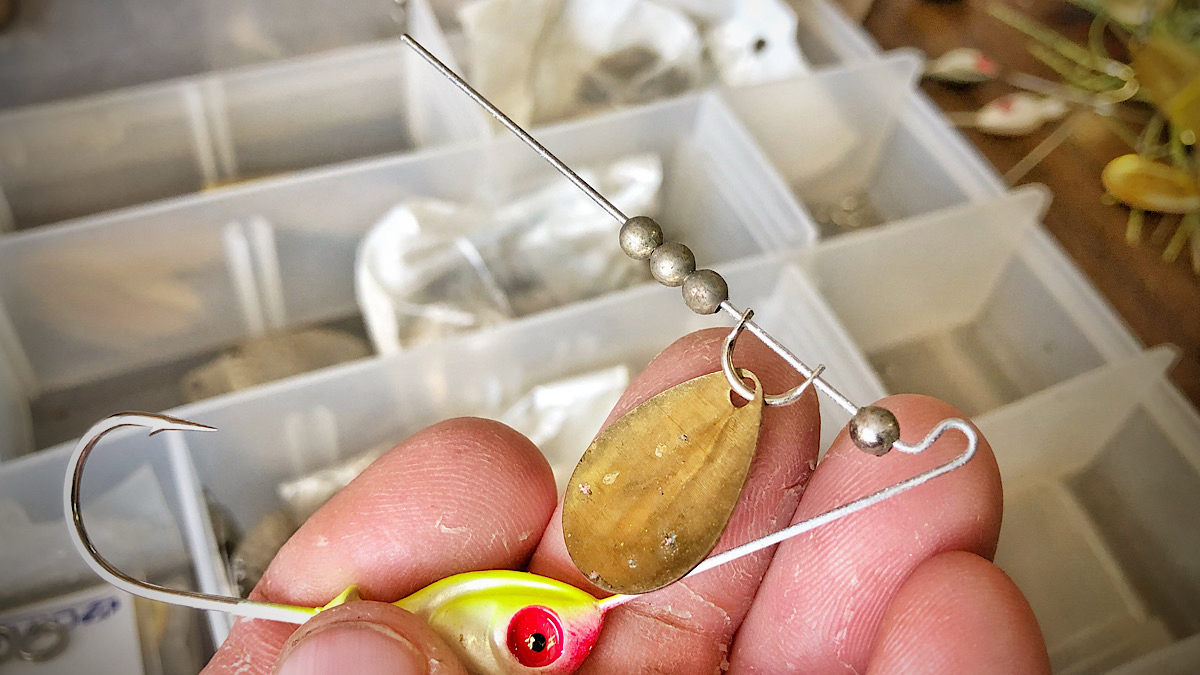
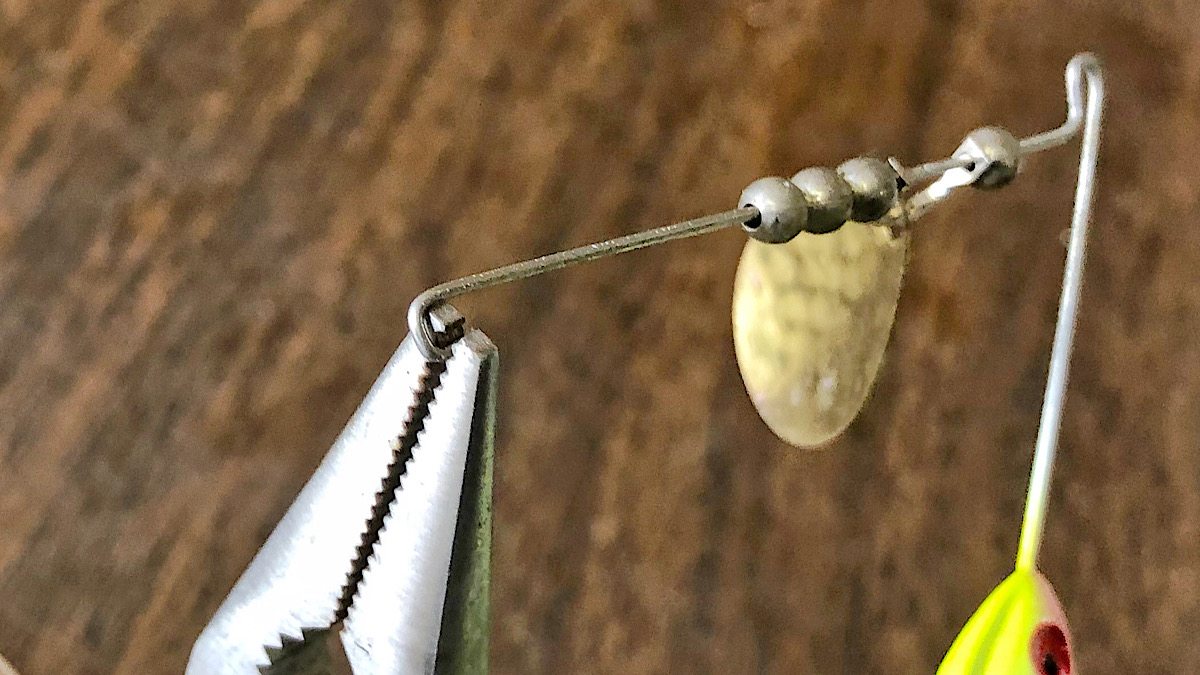
All spinnerbaits have a few basic components. Using the lead head, hook and wire harness as the starting point, you’ll then slide at least one of the little metal beads up the wire or arm of the spinnerbait. This is put here to prevent the little U-shaped clevis that comes next from sliding all the way up the arm of the spinnerbait and then getting jammed on the bend of the wire near the line tie, as that tends to happen without this little bead in place.
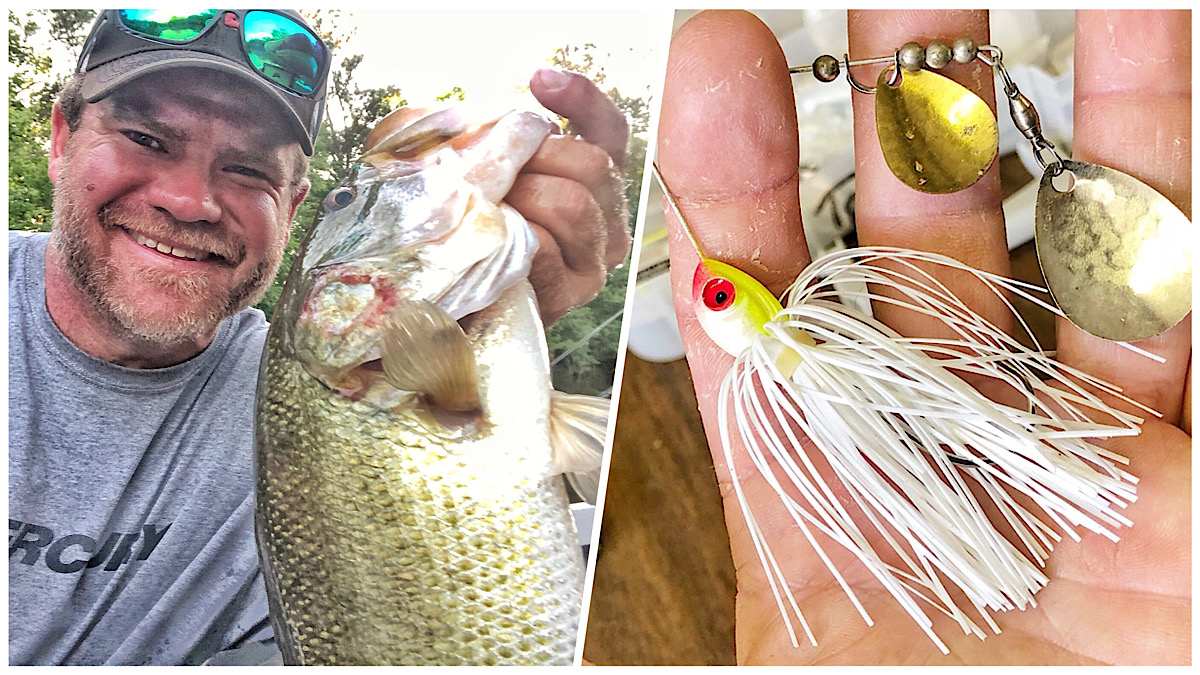
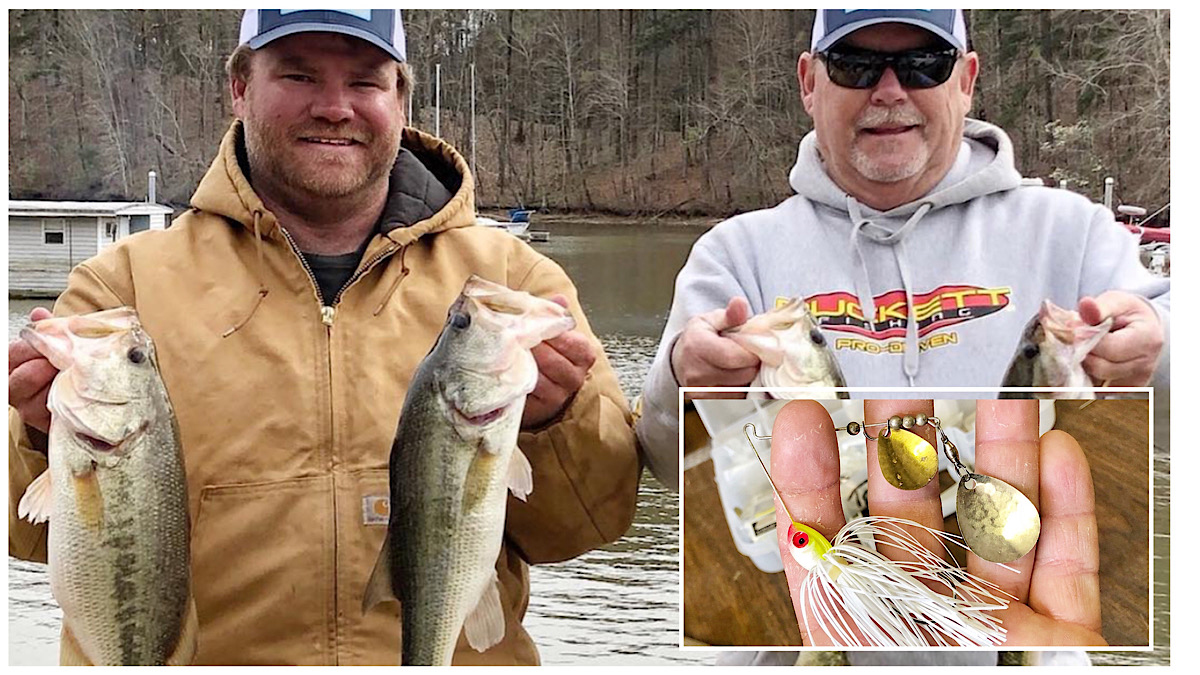
Now for our example, we’re going to make a tandem spinnerbait, simply meaning it has two blades on it. This requires a smaller blade to the inside of a larger blade.
Take a U-shaped clevis and run it through the hole in the smaller blade, then slide the clevis onto the arm of the spinnerbait. When you do this, make sure the cup of the blade is facing outward. If it isn’t, take the clevis back off and, with the blade still on it, simply flip the clevis around and run it back up on the arm. This should now have the cup facing away from the line tie. If you get this backwards, the inside of the blade can’t catch water and won’t rotate well. Now, depending on the size of your blades, you’re going to want to create some fixed distance between the blade you just put on the bait and the blade that will inevitably be attached to the end of the arm.
You can do this using several of the little metal beads or there’s the option to add long cylindrical plastic or metal spacers. We usually just put three or four beads on there and we’re good. This will be something you have to play with a bit, but the intention is to create enough space so the two blades can rotate in the water without hitting one another. Once you’ve added the appropriate amount of spacers or beads, now you’re ready to attach the blade.
I like to have the split rings, swivel and blade assembled before I add them to the end of the spinnerbait arm; it’s just easier to work with these little pieces without them all hanging off the arm. The cup direction of the bigger blade doesn’t matter because it will be on the swivel and able to freely spin. So you’ll simply put a split ring on each end of the swivel and add your blade to the split ring on the end of the swivel that spins.
Note: This is an important step. The two ends of the swivel will look similar, but one end of the swivel actually spins inside of the other. You want to attach the blade to the end that spins and the fixed end with attach to the spinnerbait arm via the split ring on that end.
Adding the blade assembly and picking out a skirt
To attach the blade assembly to the spinnerbait, you’ll want to take the tip of the spinnerbait arm wire with the end of a pair of needle-nose pliers and begin to roll the wire, slowly bending it into a tight U-shape. You want to bend it slowly to avoid breaking the wire. Keep bending it until you’ve almost got the tip of the wire back around to where it will meet the arm. Then slip the split ring of the blade assembly into this loop you’ve made in the wire and use your pliers to close the loop off by pinching the loop shut.
Now you’re ready to add a skirt. There are lots of options out there for skirts. Rubber and silicone are the two main materials. We go a little old school with it usually and use the living rubber skirts but all are good options and you’ll have a ton to choose from when it comes to color.
We don’t typically recycle the skirts from the boneyard. They get pretty dirty and the rubber bands that hold the skirts together also tend to dry rot and fall apart, so you’re better off with a new one. Most skirts will have a longer and shorter end. You want to slide the hook through from the longer end of the skirt. This will allow the longer end of the skirt to fluff out and bend back, which will make it about the same length as the straight but shorter end of the skirt that is now on the inside of the bent back longer skirting.
That’s it; now you have your very own custom-made spinnerbait. You can toy around with different skirts, blades and spacers. In time, you’ll dial in one specific spinnerbait that you’ve caught several fish on and you’ll have a pattern to go by moving forward. Hopefully catching a fish on something you built will give you a similar sense of satisfaction and confidence that it does us. I’m pretty sure it’s a safe bet that it will.